Enabling IMAP/SMTP Services and Retrieving the SMTP Authorization Password for Email Forwarding in the "All-in-One Site Management" Plugin.
To enable users to receive a registration verification code when registering with their email using the "Website Management All-In-One Function" plugin, you need to enter the SMTP interface information used for email forwarding in the plugin's email interface settings. For users who are configuring SMTP for the first time, you may not know how to enable and obtain the SMTP interface for your personal email. This article will guide you through enabling the SMTP service for your personal email and correctly entering the SMTP information into the "Website Management All-In-One Function" plugin's email interface settings. This will allow WordPress website users to receive the verification code sent by the website when they register with their email, completing the user registration process in the Member Center.
Next, we will take personal 163 Mail and QQ Mail as examples. By reading and following the steps in this article, you can enable and obtain the SMTP password for your email. While enabling the SMTP service and generating the SMTP authorization password, we also need to copy and save the email server address. This address will later be used to copy and paste into the "SMTP Server Address" input field in the "Website Management All-In-One" plugin's email interface settings. Below, we will demonstrate the specific steps.
Ⅰ、Enabling SMTP Service and Retrieving SMTP Authorization Password for 163 Email
Step 1: Access the POP3/SMTP/IMAP Settings Page
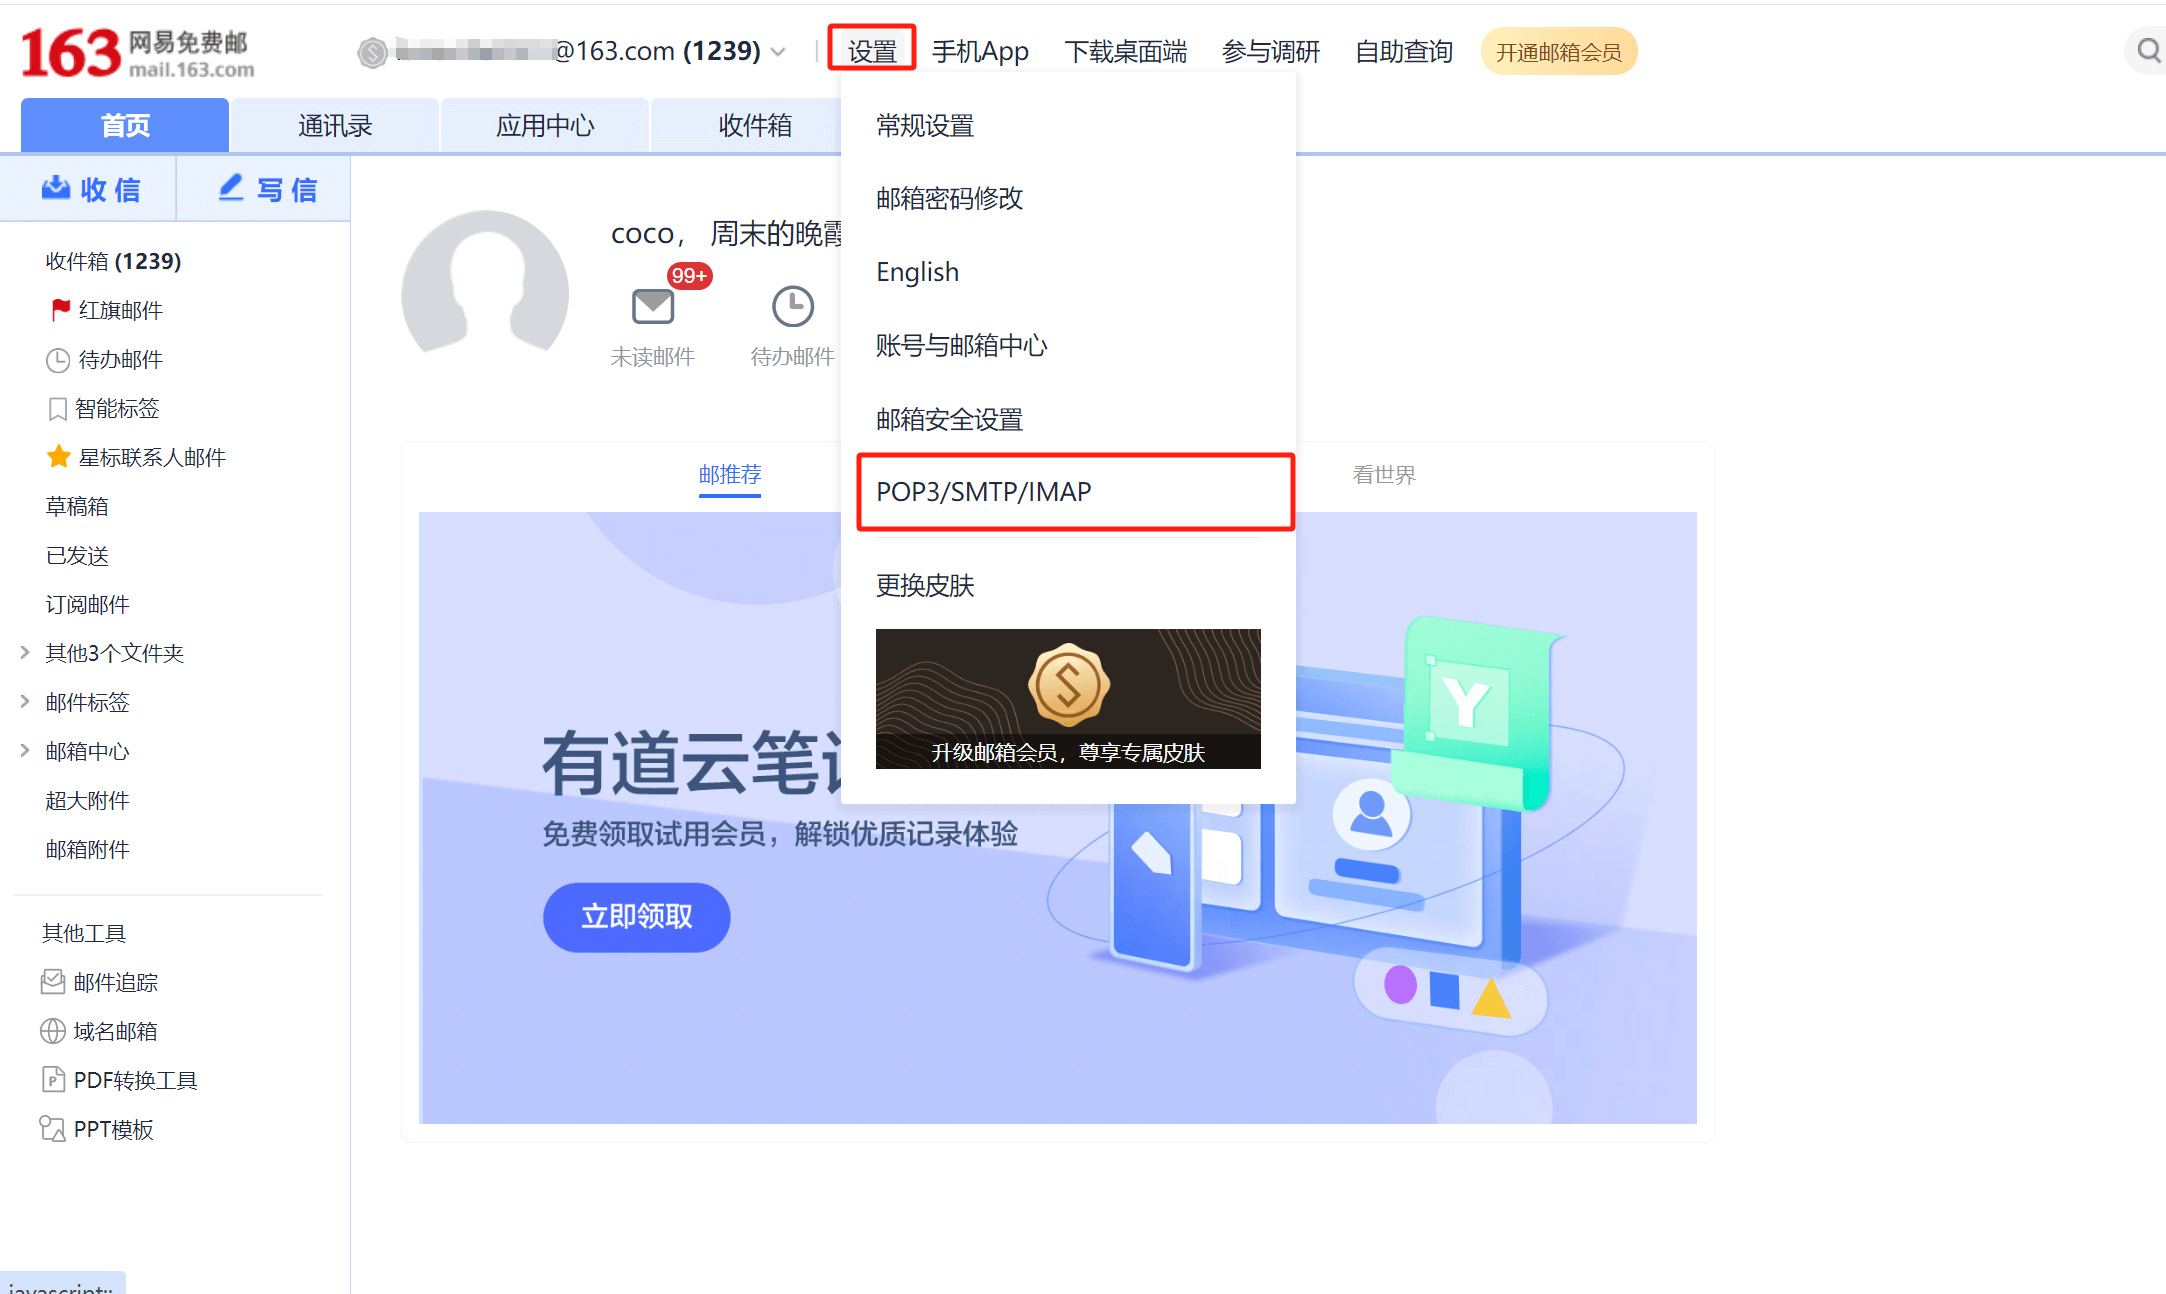
As shown in the image below, click on "Settings" on the 163 email homepage. This will reveal the "POP3/SMTP/IMAP" entry, marked with a red box. Click on "POP3/SMTP/IMAP" to enter the SMTP settings page shown in the following image.
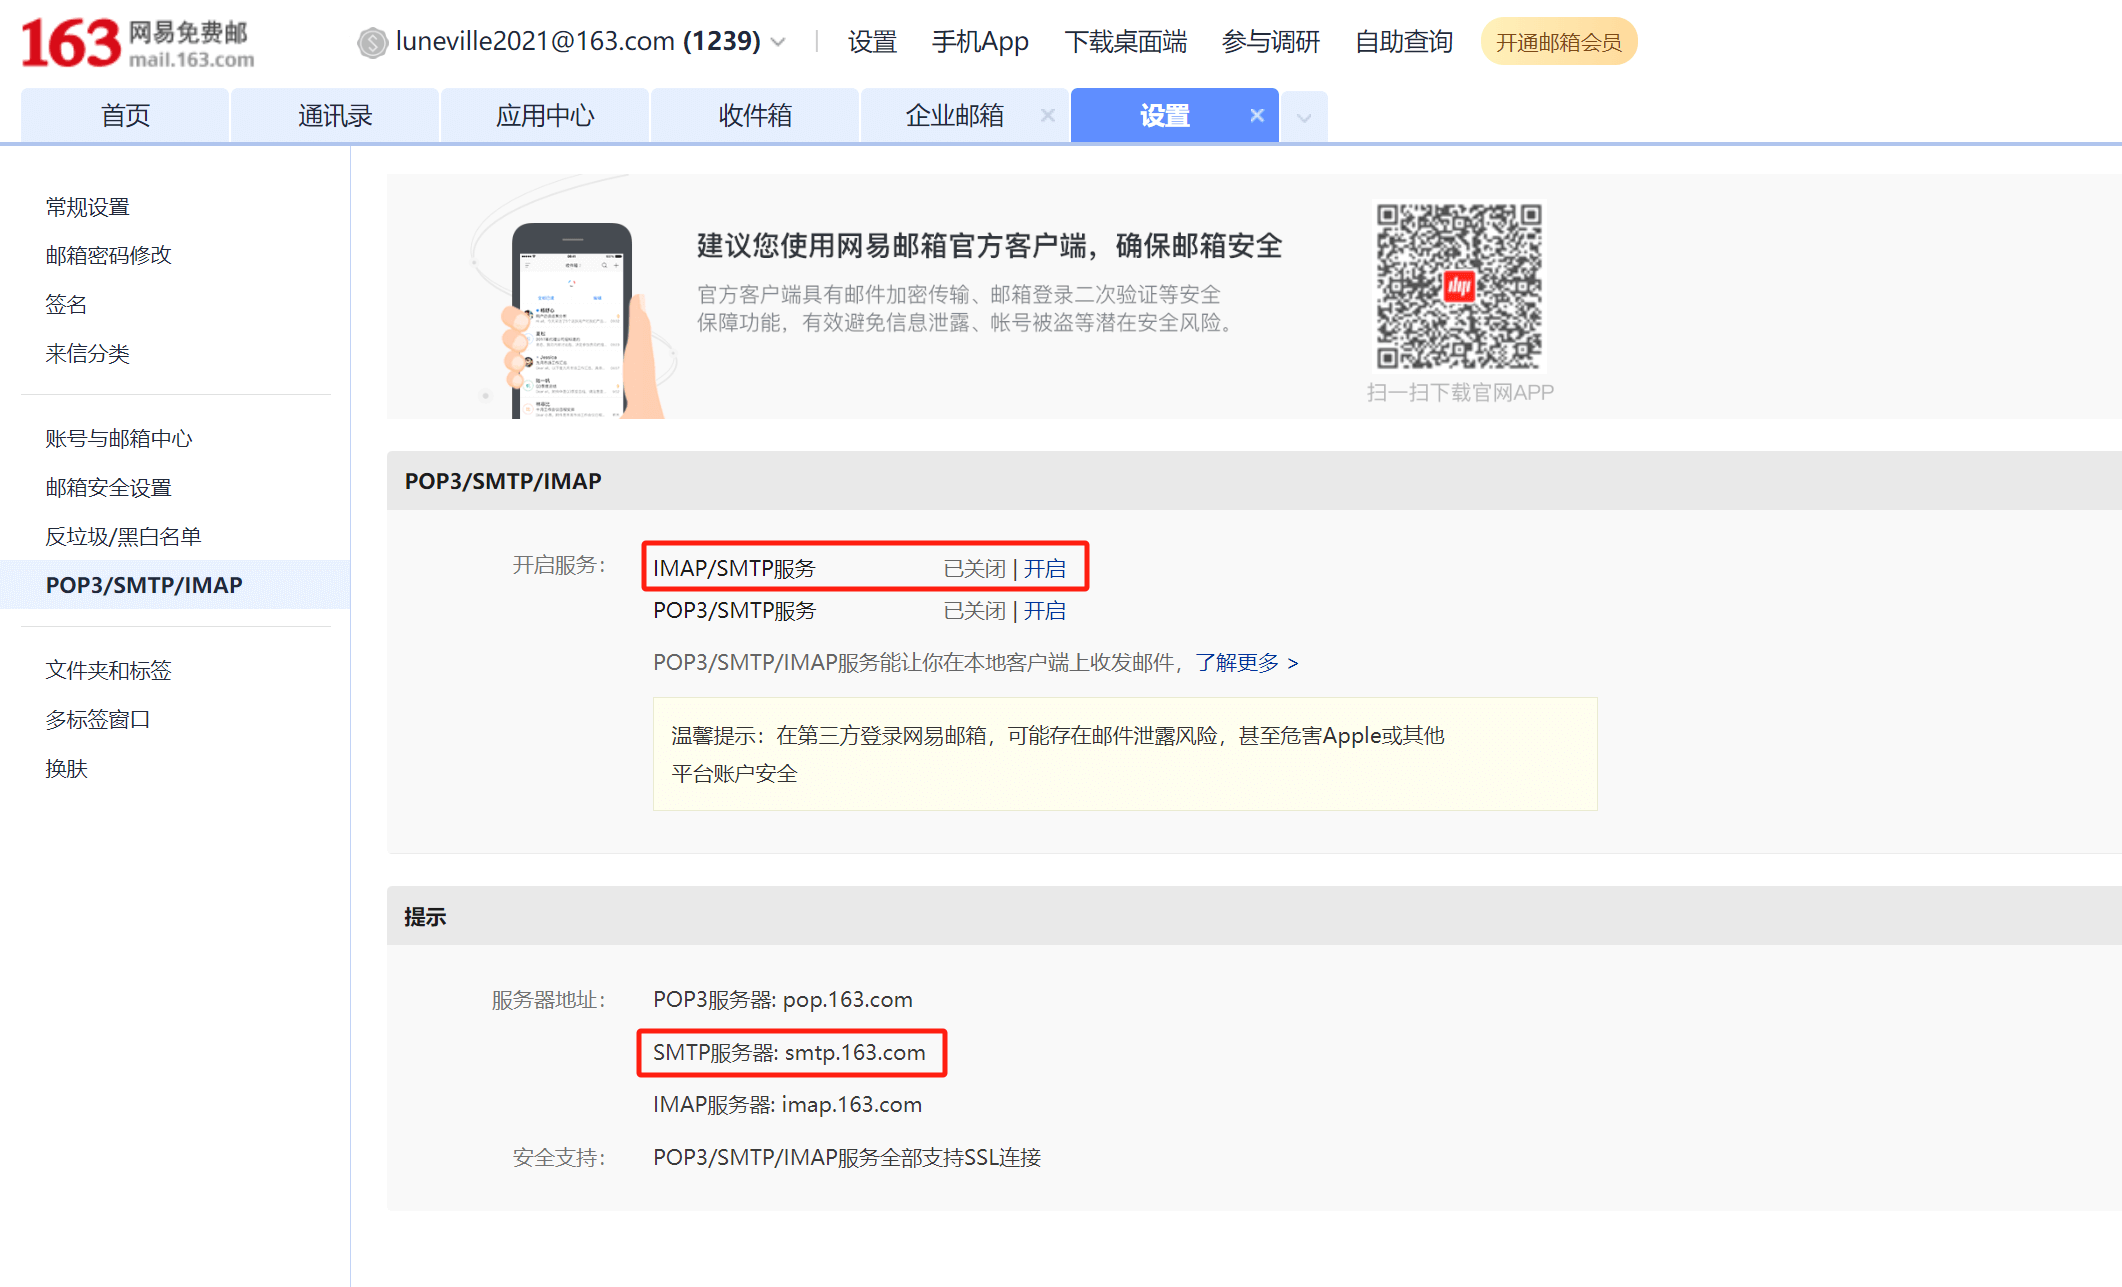
Step 2: Enable POP3/SMTP/IMAP Service and Generate SMTP Authorization Password
As shown in the red box in the image above, simply enable the IMAP/SMTP service, as our plugin uses the authorization of the IMAP/SMTP service. Therefore, POP3/SMTP authorization is not required. Click the "Enable" button to start the service. During the service activation, verification will be required. After verification, the SMTP password will pop up on the page as shown in the image below. Please make sure to note that the authorization password will only be displayed once, so make sure to copy and save the password before closing the window. In the "Device Used" input box, you can label the name of this key. Also, copy the SMTP server address: smtp.163.com into a newly created txt text file, as you will need it later.
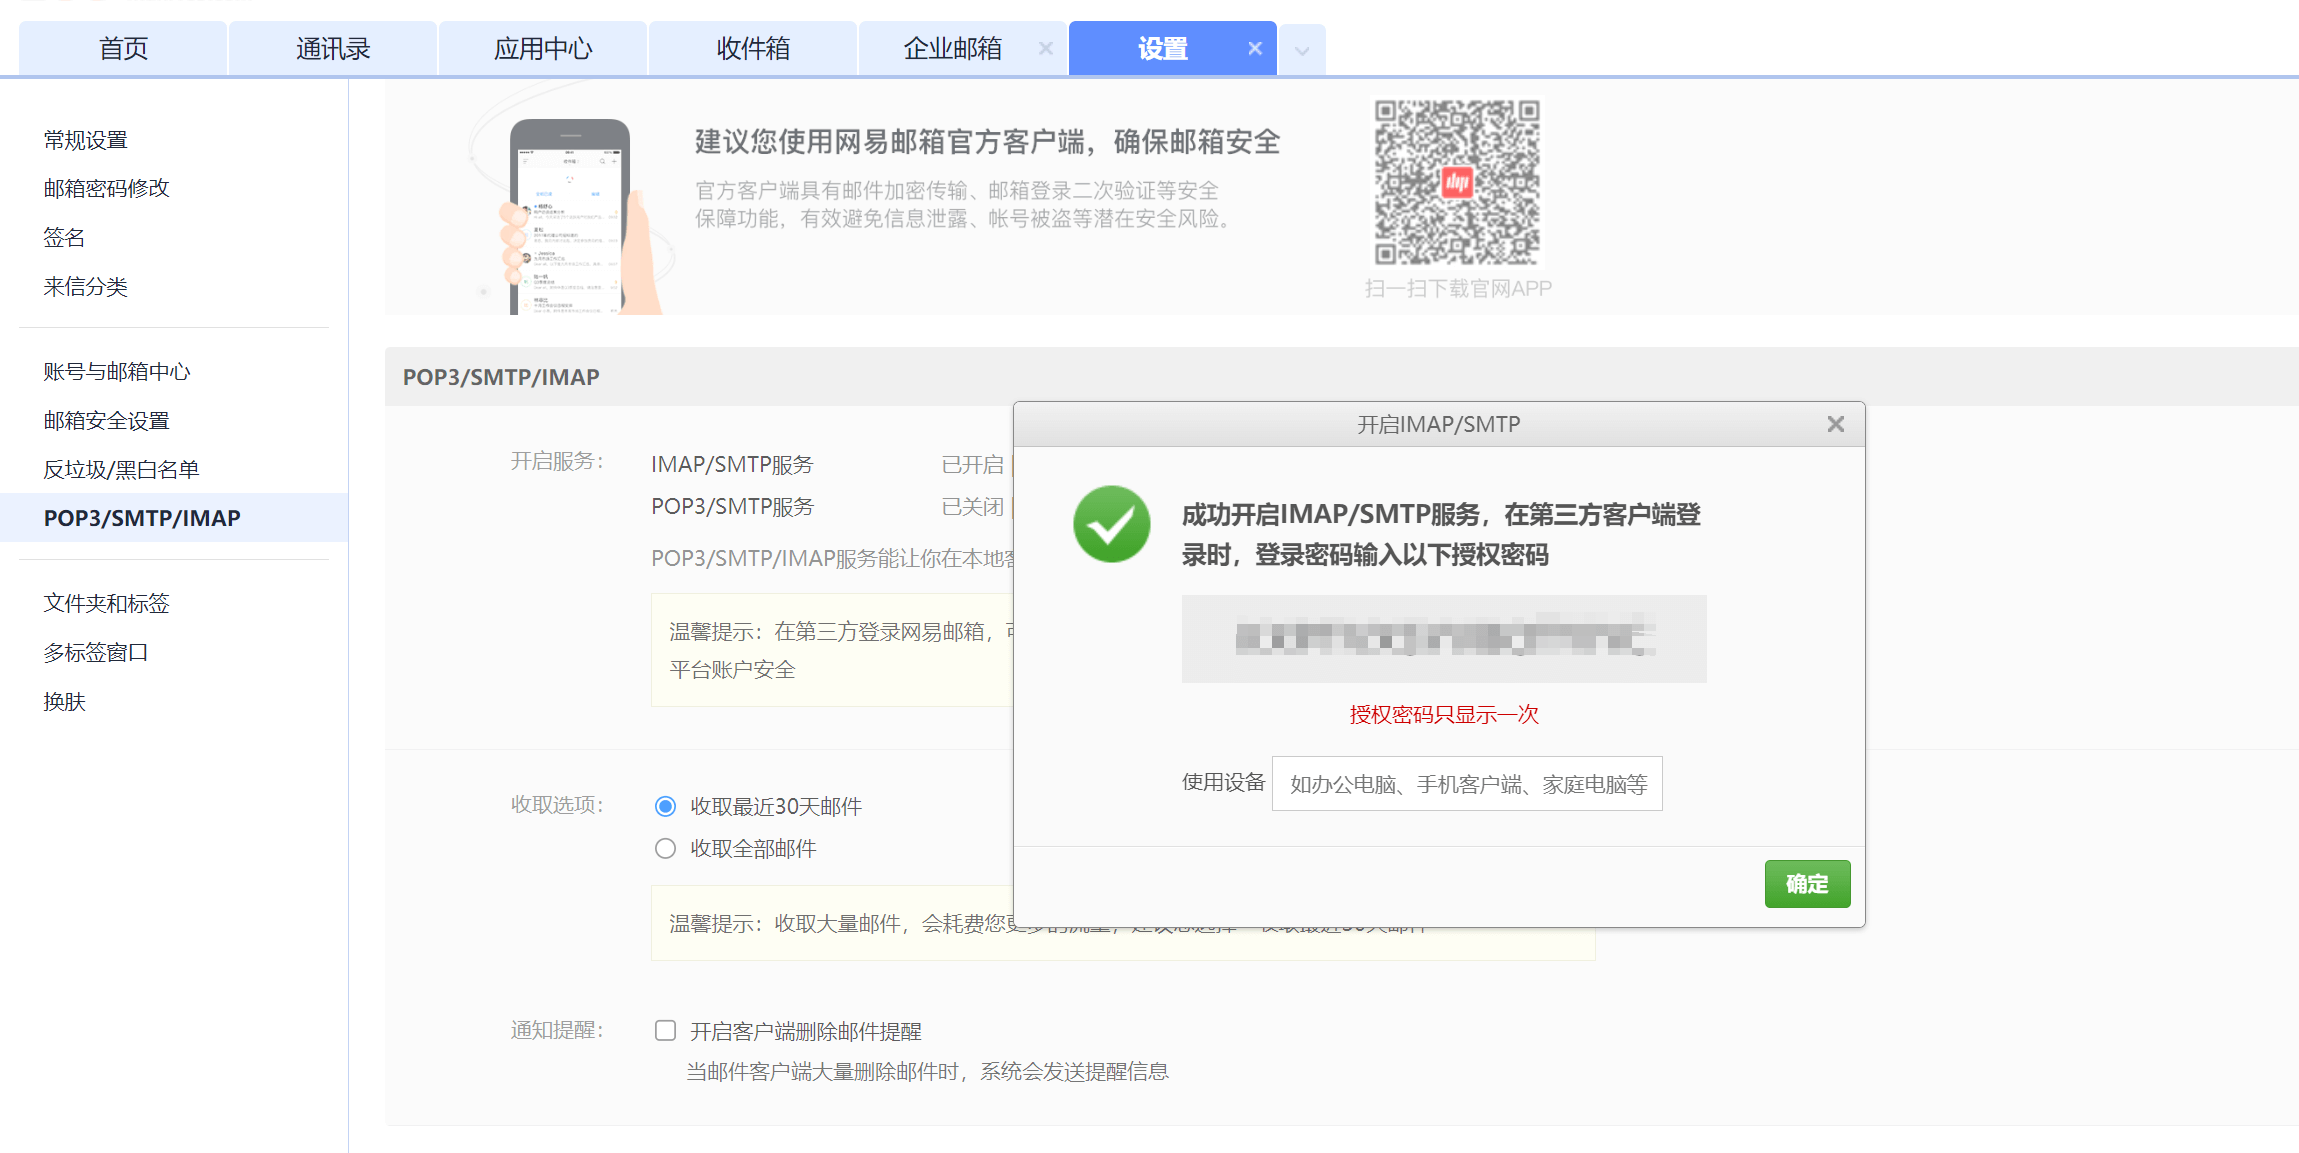
At this point, the IMAP/SMTP service for 163 email has been successfully enabled, and you have obtained the SMTP authorization password and the SMTP server address for 163 email. Save these details and input them into the email interface settings in the "Website Management All-in-One" plugin.
II、Enabling SMTP Service and Retrieving SMTP Authorization Password for QQ Email
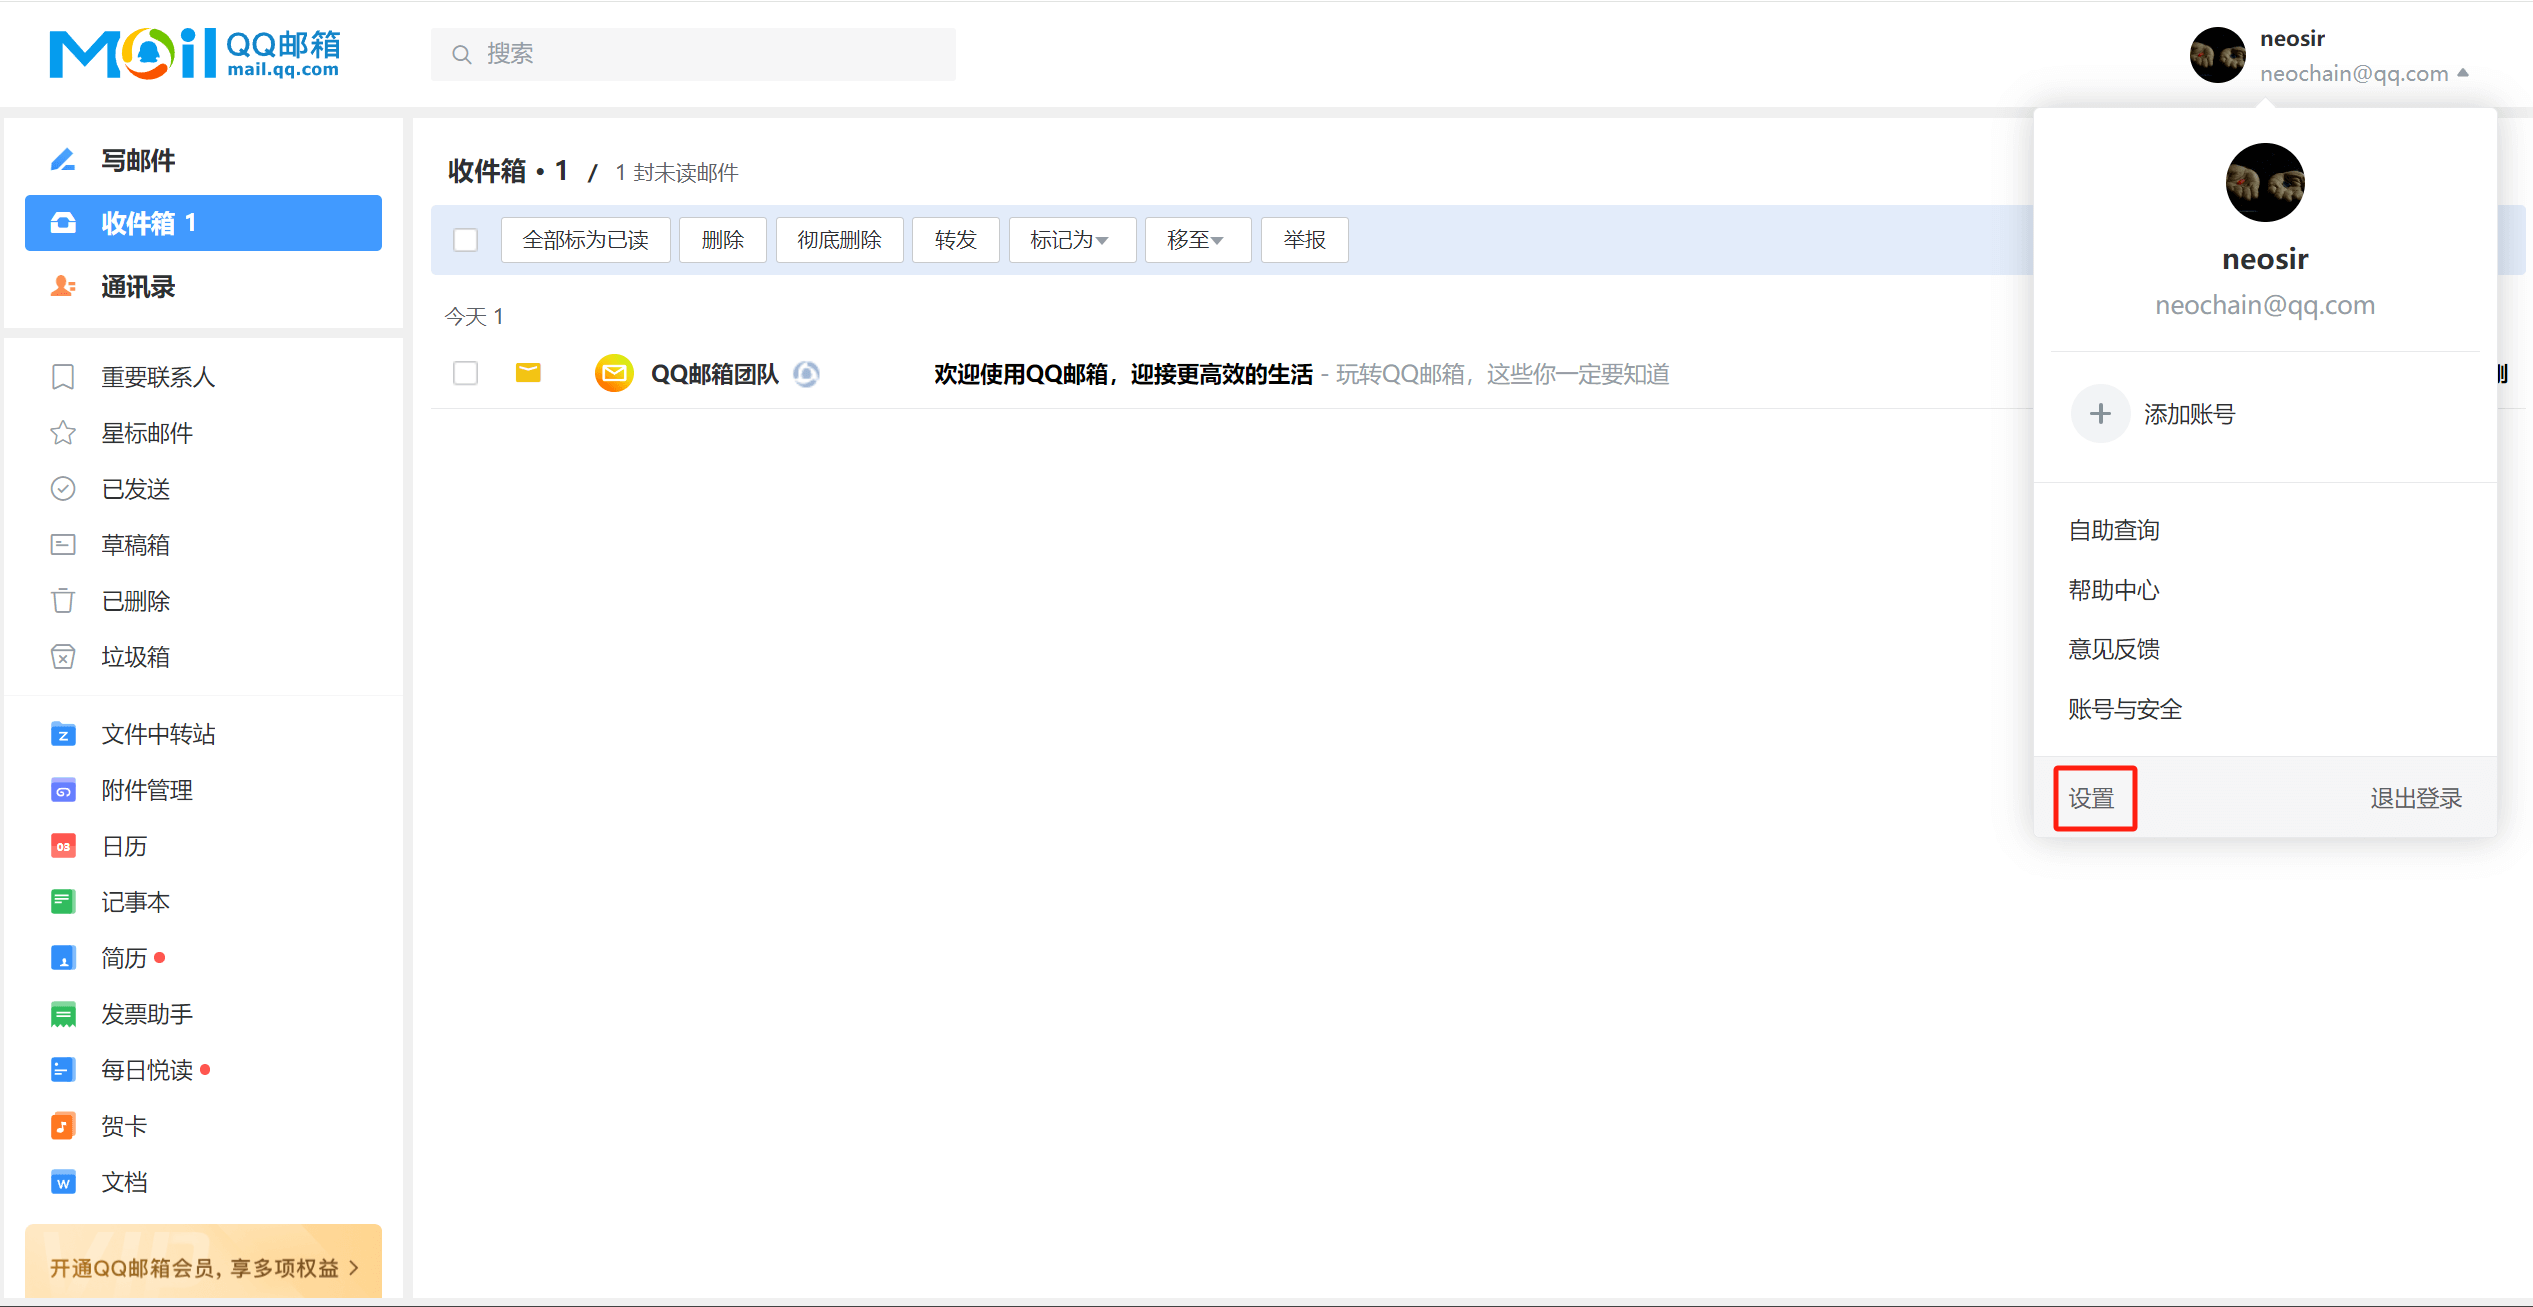
Step 1: Access QQ Email's IMAP/SMTP Settings Page
As shown in the image below, after successfully logging into QQ Email, click on the user account icon in the top right corner of the homepage. A dropdown menu will appear, and you should click on the "Settings" button, as marked by the red box. This will redirect you to the QQ Email settings page, which is shown in the following step’s illustration.
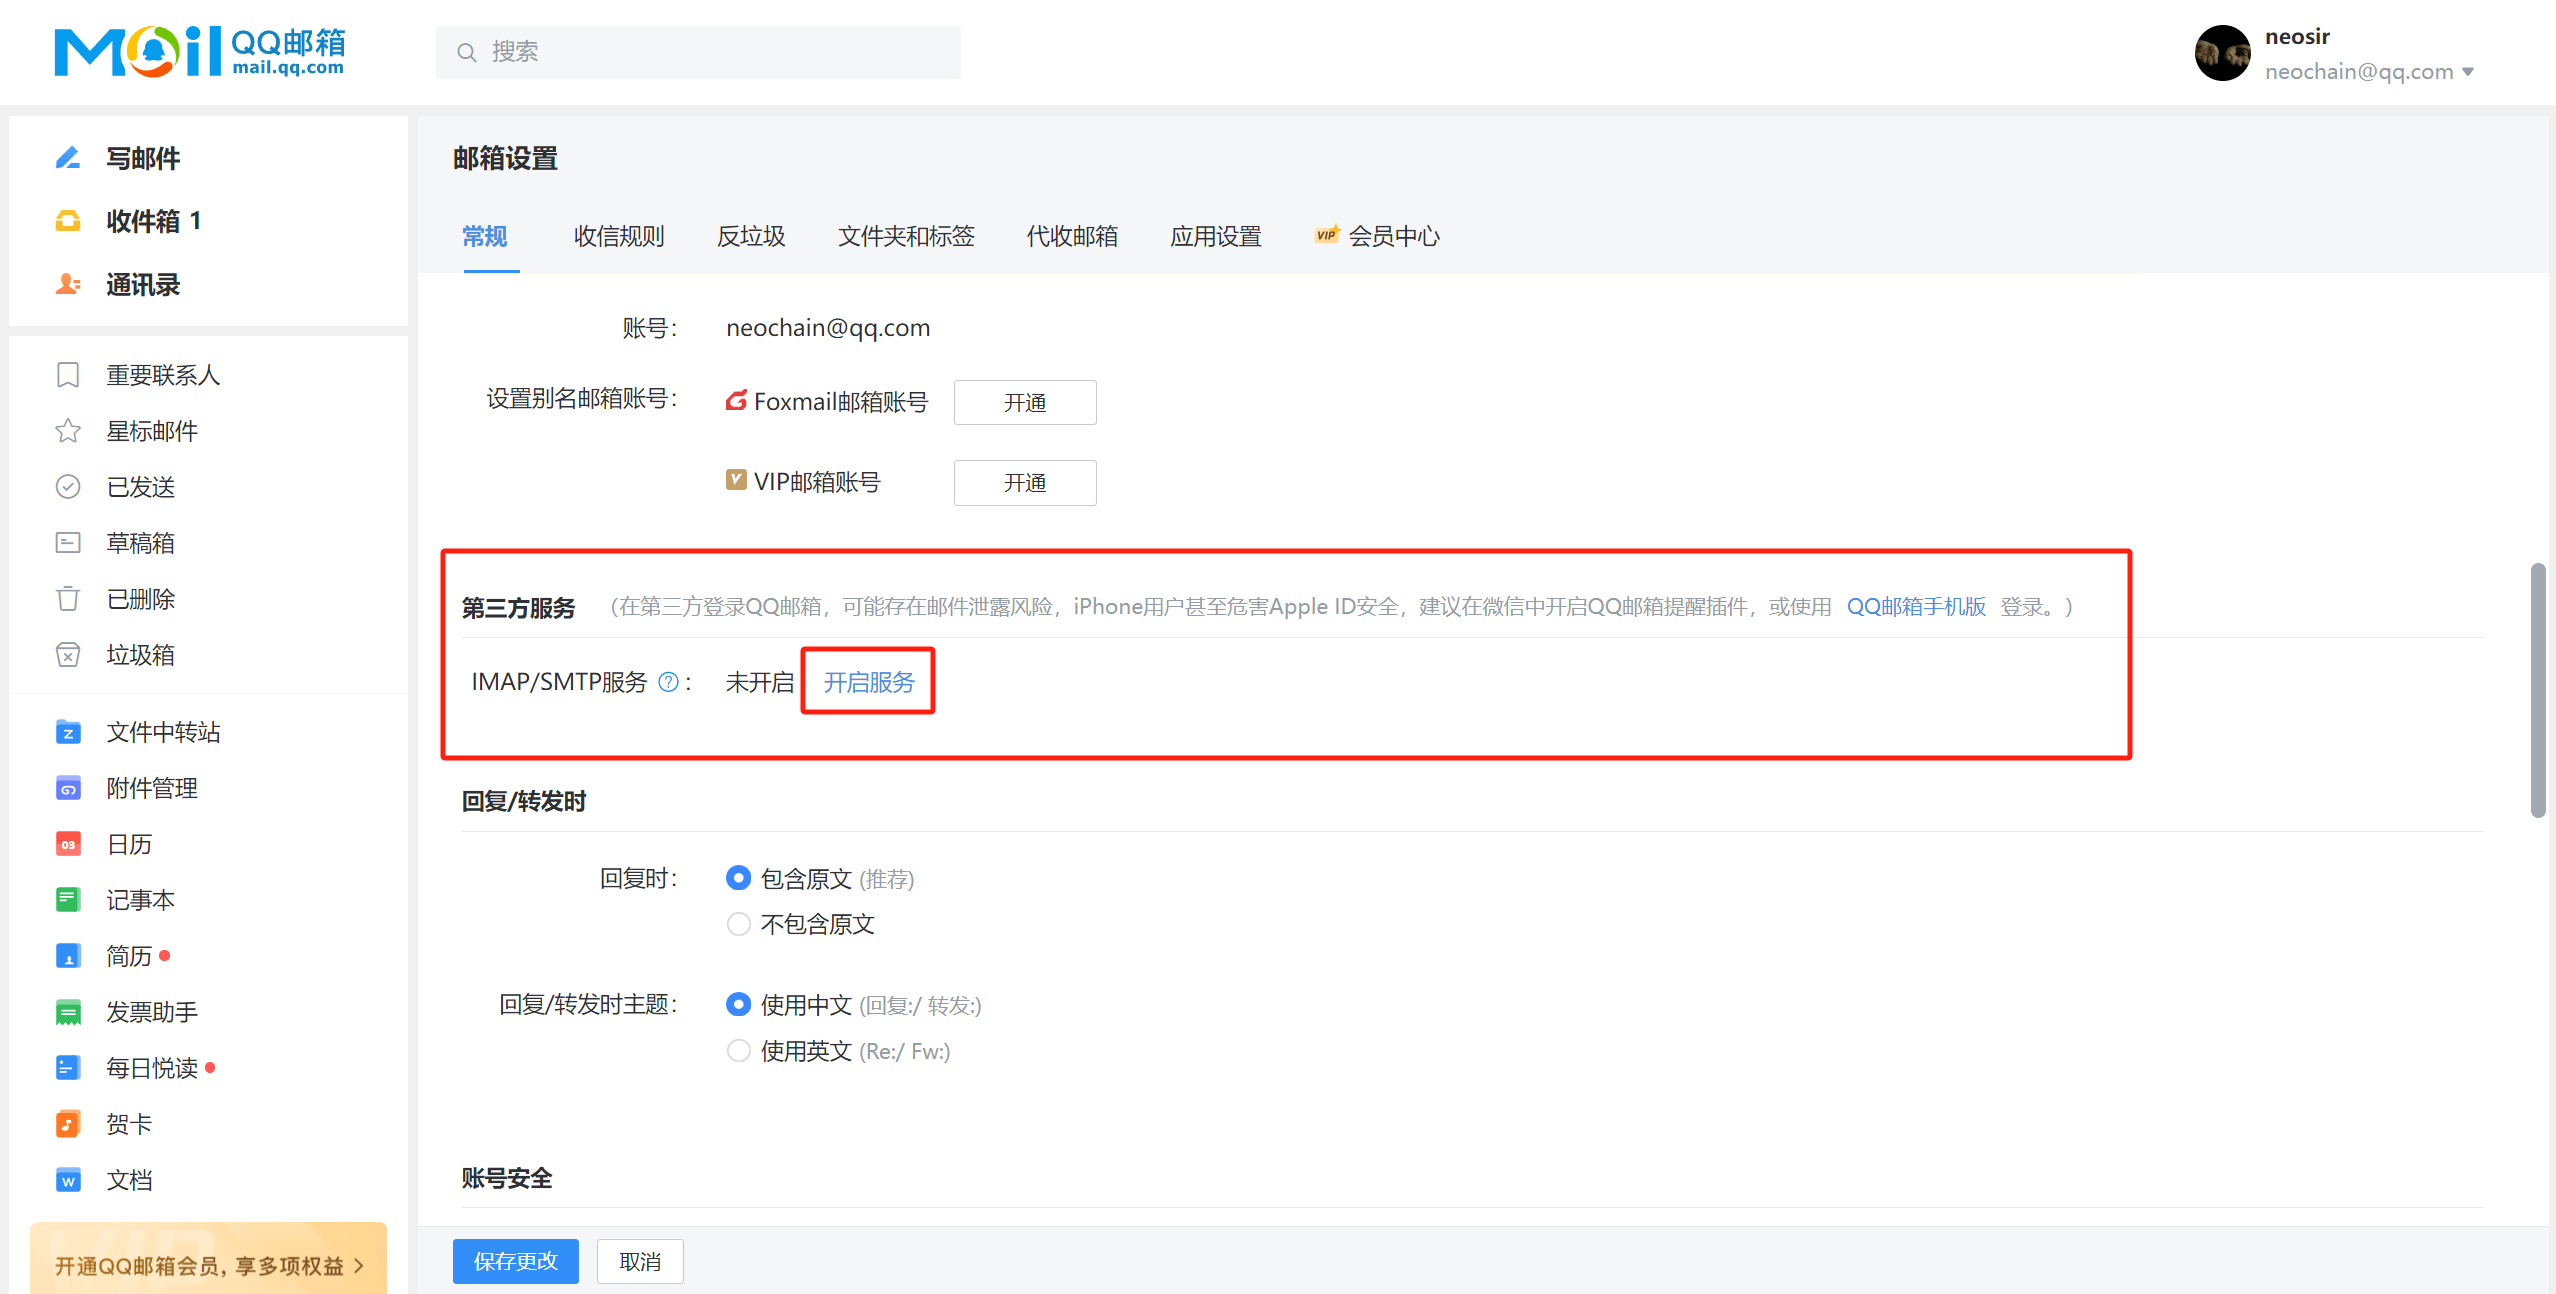
Step 2: Enable QQ Email's IMAP/SMTP Service and Generate SMTP Authorization Password
On the QQ Email settings page, scroll down the browser’s page to the "Third-Party Service" section, as shown in the image below. Here, you can see that QQ Email only offers SMTP service with IMAP/SMTP by default. Since the "Website Management All-in-One" plugin from LogicTech Digital Technology also uses IMAP/SMTP by default, you can simply click "Enable Service" without needing to make any additional selections. The SMTP server address for QQ Email is: smtp.qq.com. Create a new .txt file to save the QQ Email SMTP server address and the SMTP authorization password obtained after enabling IMAP/SMTP. Then, copy and paste these details into the corresponding email interface settings in the "Website Management All-in-One" plugin.
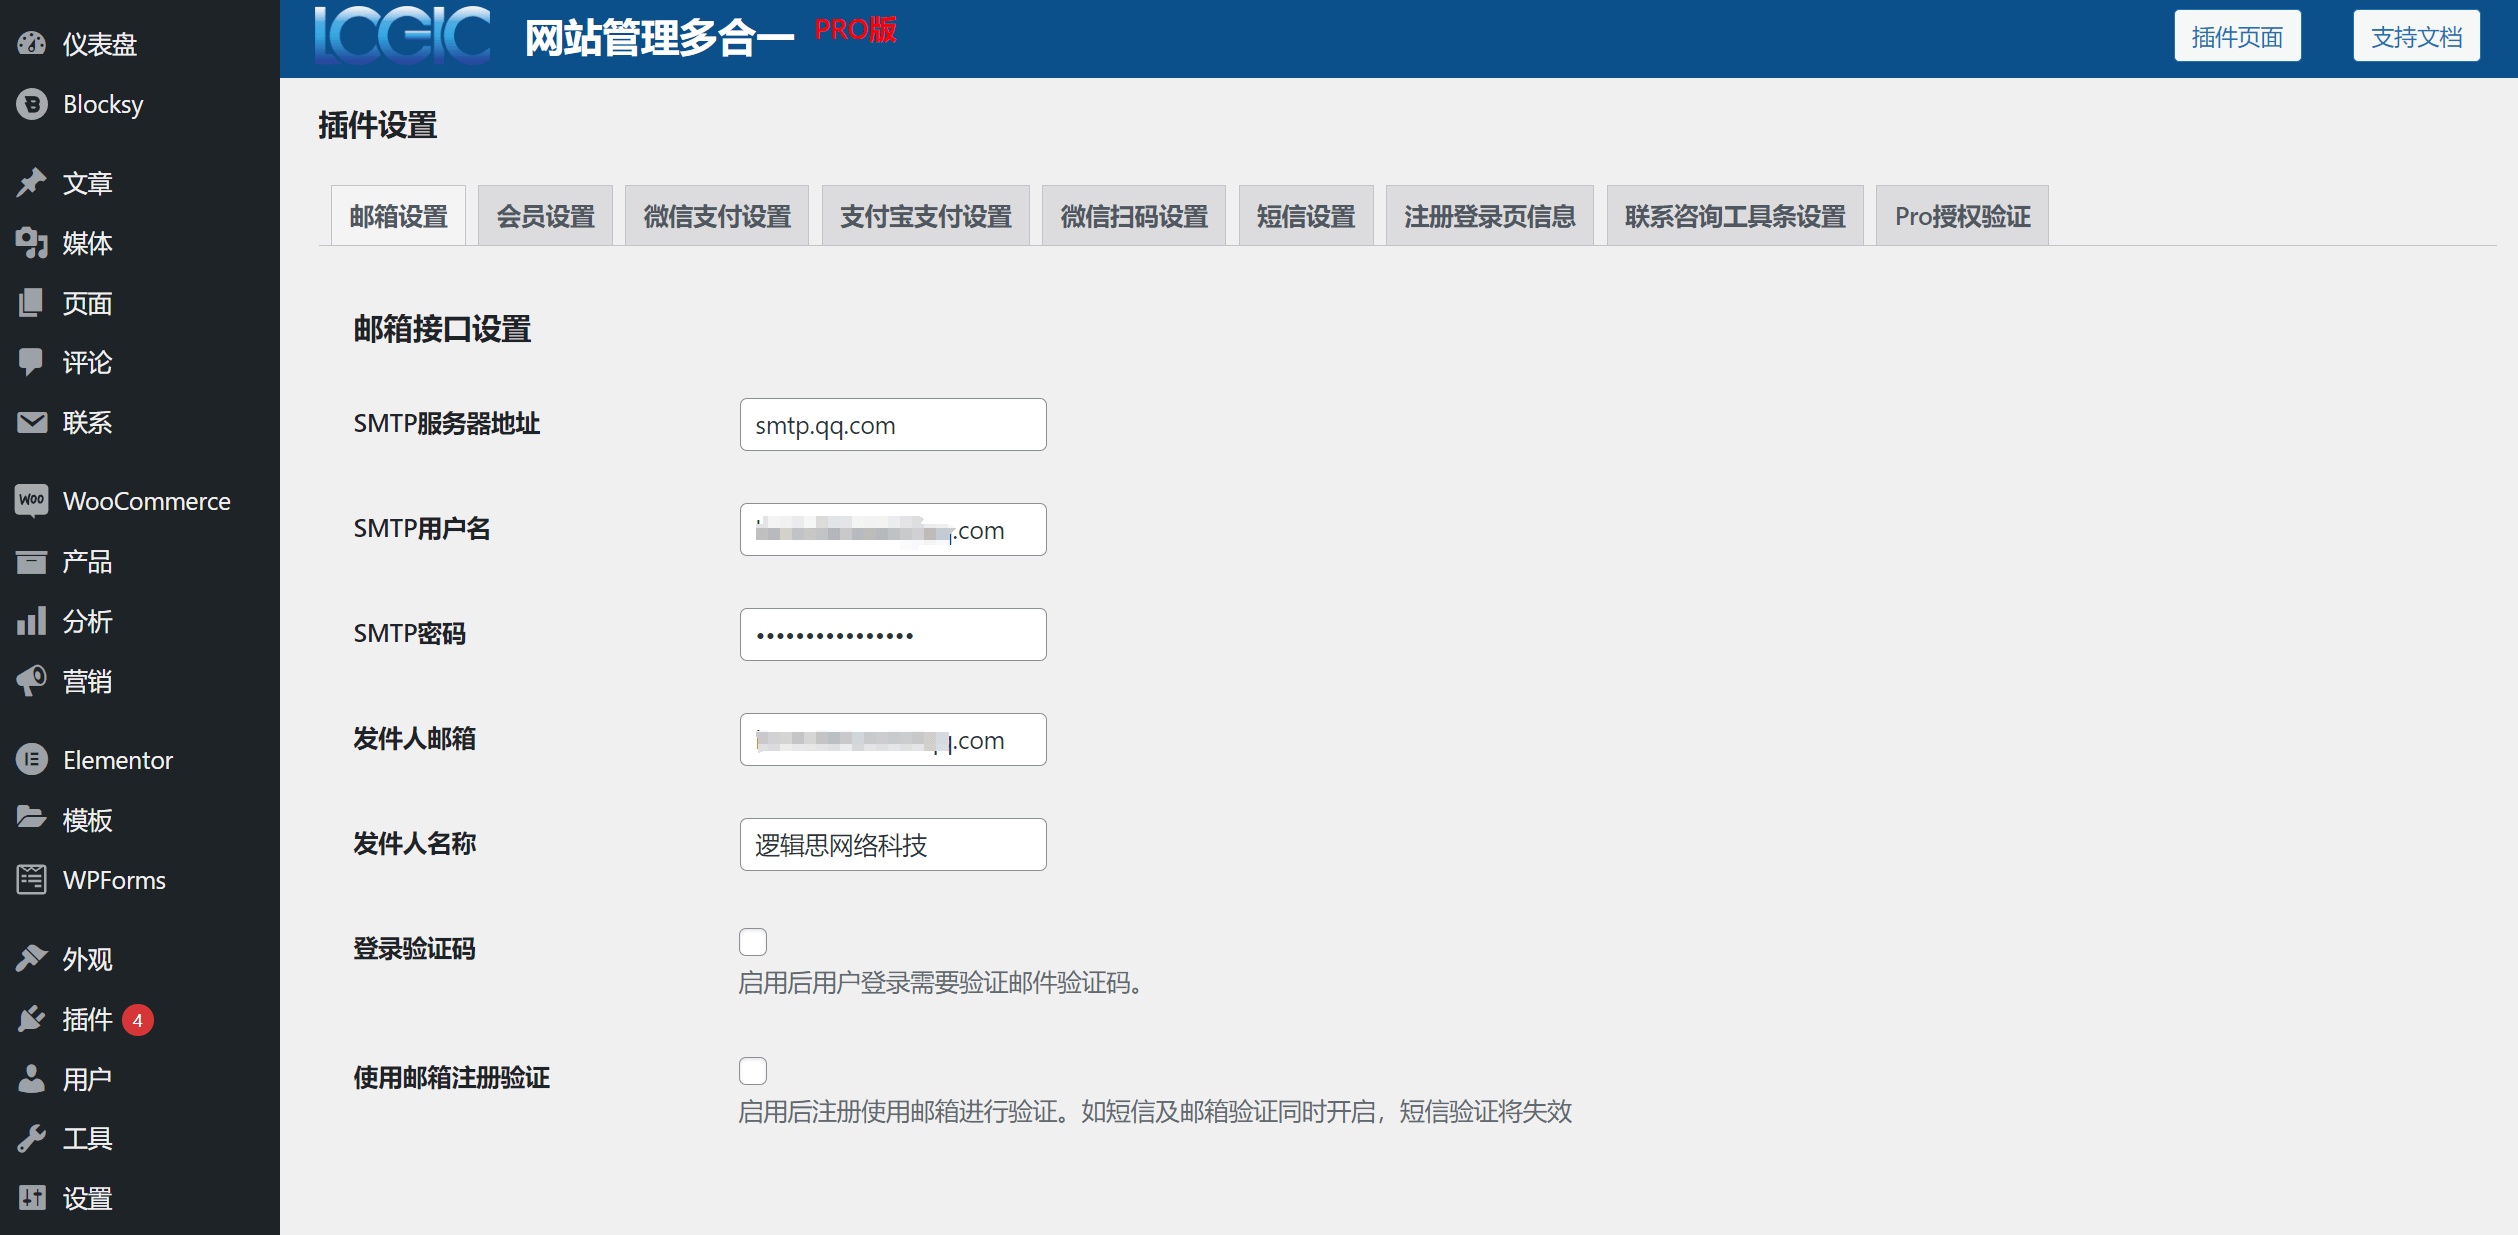
III. Email Interface Settings for Website Management All-in-One Plugin
- SMTP Server Address: Enter or copy and paste the SMTP server address of your email. For NetEase 163 email, it is smtp.163.com, and for QQ email, it is smtp.qq.com.
- SMTP Username: Email address
- SMTP Password: SMTP authorization password
- Sender Email: Email address
- Sender Name: Customizable sender name for emails, usually the company or brand name
- Login Verification Code: Whether to enable a verification code for user login in the Member Center. This can be enabled or disabled based on the website’s needs.
- Use Email for Registration Verification: Whether to restrict user registration in the Member Center to email-only verification. If this option is checked, users will not be able to register with SMS verification.
Conclusion: By following the steps above, you can enable the SMTP service for your email and obtain the SMTP authorization password. Use these email interface settings, input the required parameters, and enter the email's SMTP server address into the corresponding input field in the "Website Management All-in-One" plugin's email settings section. Click the "Save Changes" button at the bottom of the plugin to apply the settings. This will allow users to successfully receive the verification code required for registration when they register their account in the member center using their email.
Logic Digital Technology (SZLOGIC) All rights reserved. Reproduction is prohibited.