


Jetpack Setup Tutorial
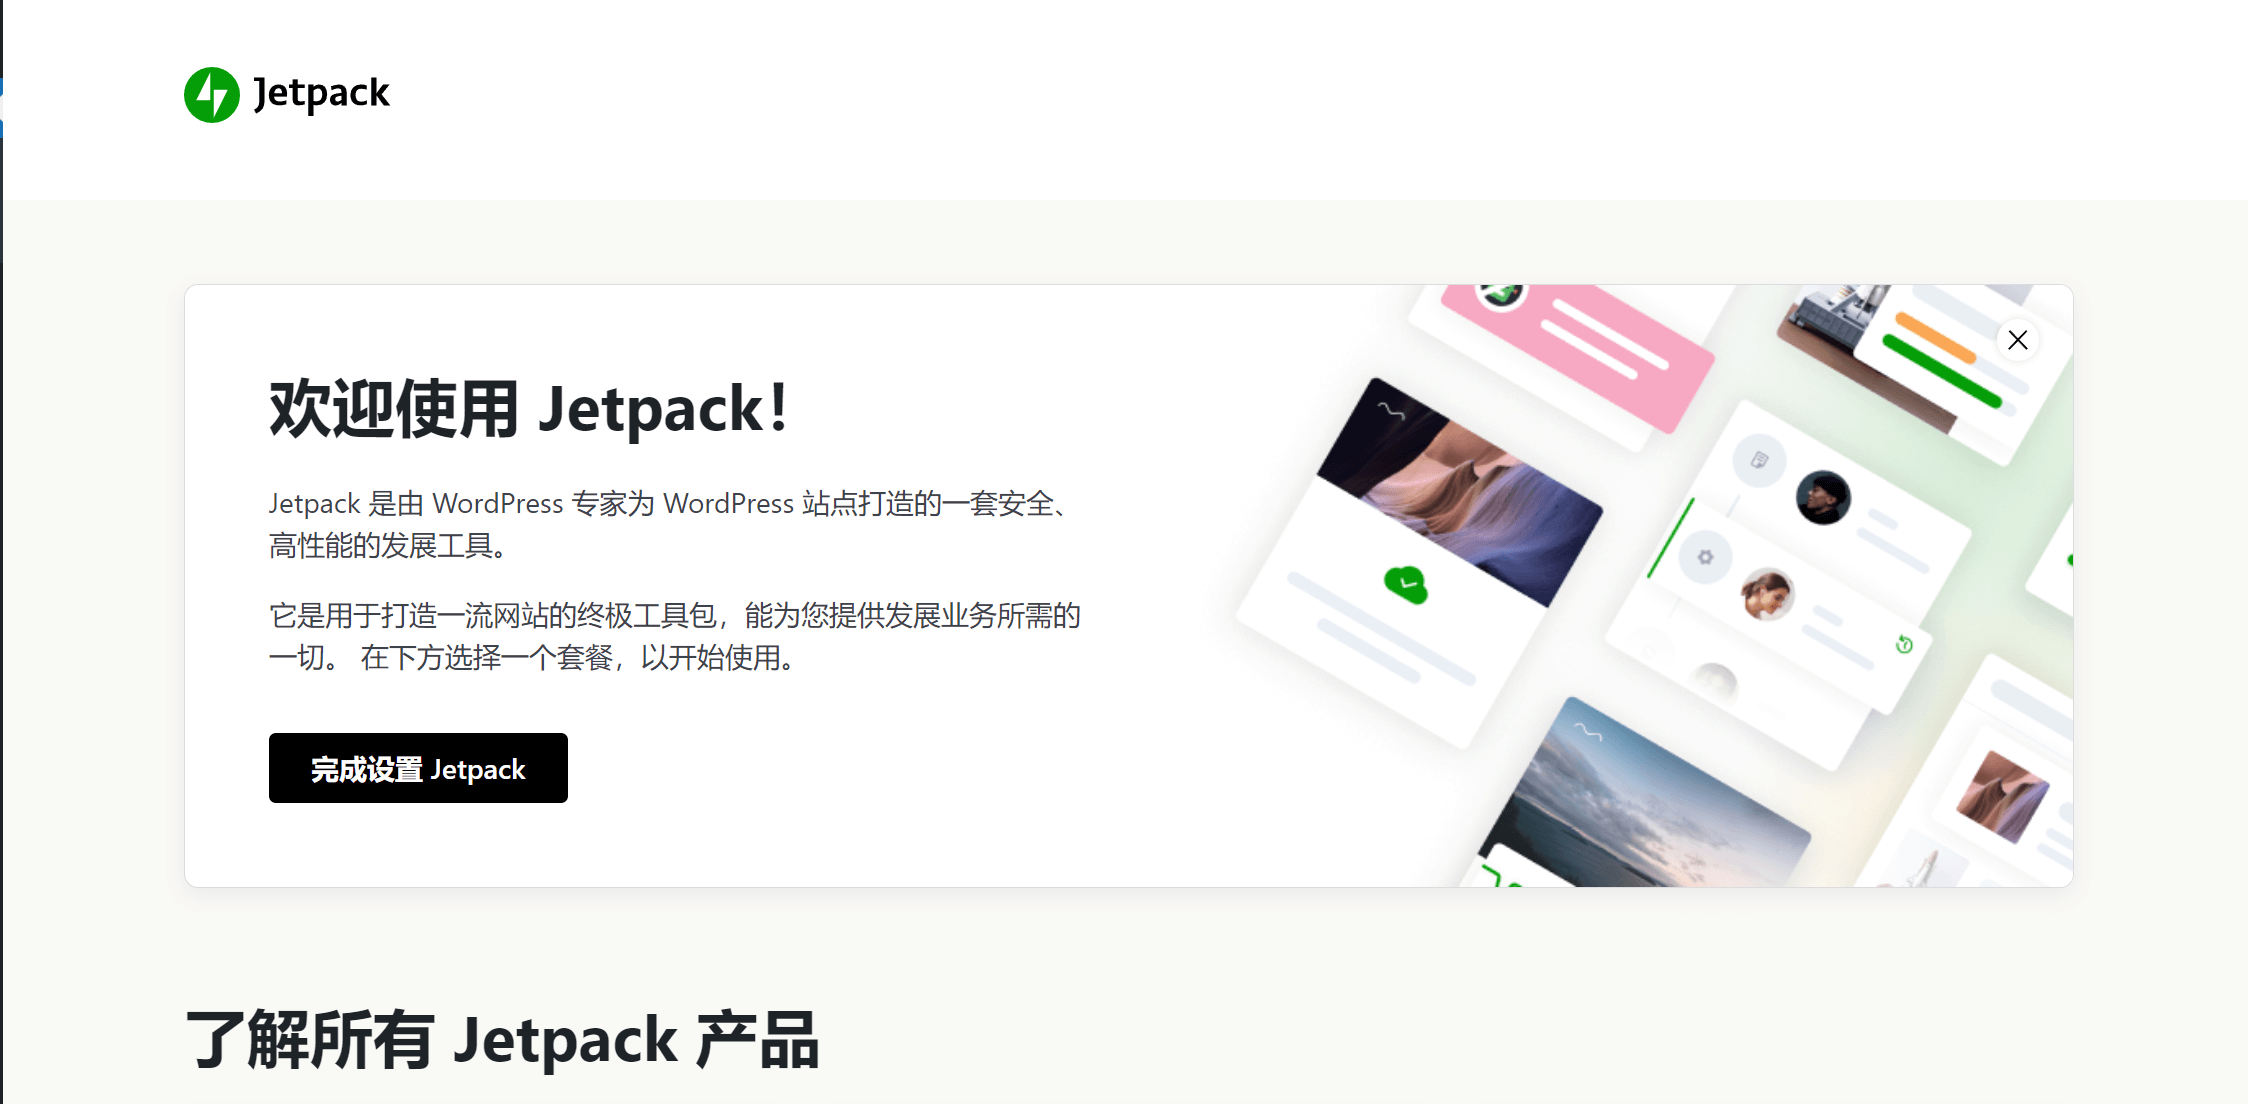
The Jetpack plugin is a powerful plugin on the WordPress platform, developed and supported by Automattic, the parent company of WordPress. In addition to integrating general features such as website traffic analytics, website security, performance optimization, social media tools, and search engine optimization, Jetpack also includes monetization features to help websites generate revenue, along with many other useful functionalities. These make managing and optimizing WordPress sites easier and more efficient.
Through this tutorial, you can use the Jetpack plugin to set up a security firewall for your WordPress website to enhance the site's security level and optimize its loading speed to improve performance scores. You will also learn:
- How to Use Jetpack to Set Up Social Media Features on a WordPress Website to Increase Content Reach
- How to Use Jetpack to Enable CDN Functionality for Image Files on a WordPress Website
- How to Use Jetpack to Implement Data Analytics on a WordPress Website
- How to Use Jetpack Features to Add More Functionality to a WordPress Website
This tutorial will gradually explain the various features and settings of Jetpack through the following structured content directory. If you have already installed Jetpack and made general settings, but are still confused about a specific setting, you can also click on the links in the directory below for selective reading and find the explanation for that particular feature setting.
- Connecting Jetpack with a WordPress Account
- Security Settings
- Performance Settings
- Writing Settings
- Sharing Settings
- Discussion Settings
- Traffic Settings
- Newsletter Settings
- Monetization Settings
一、Connecting Jetpack with a WordPress Account
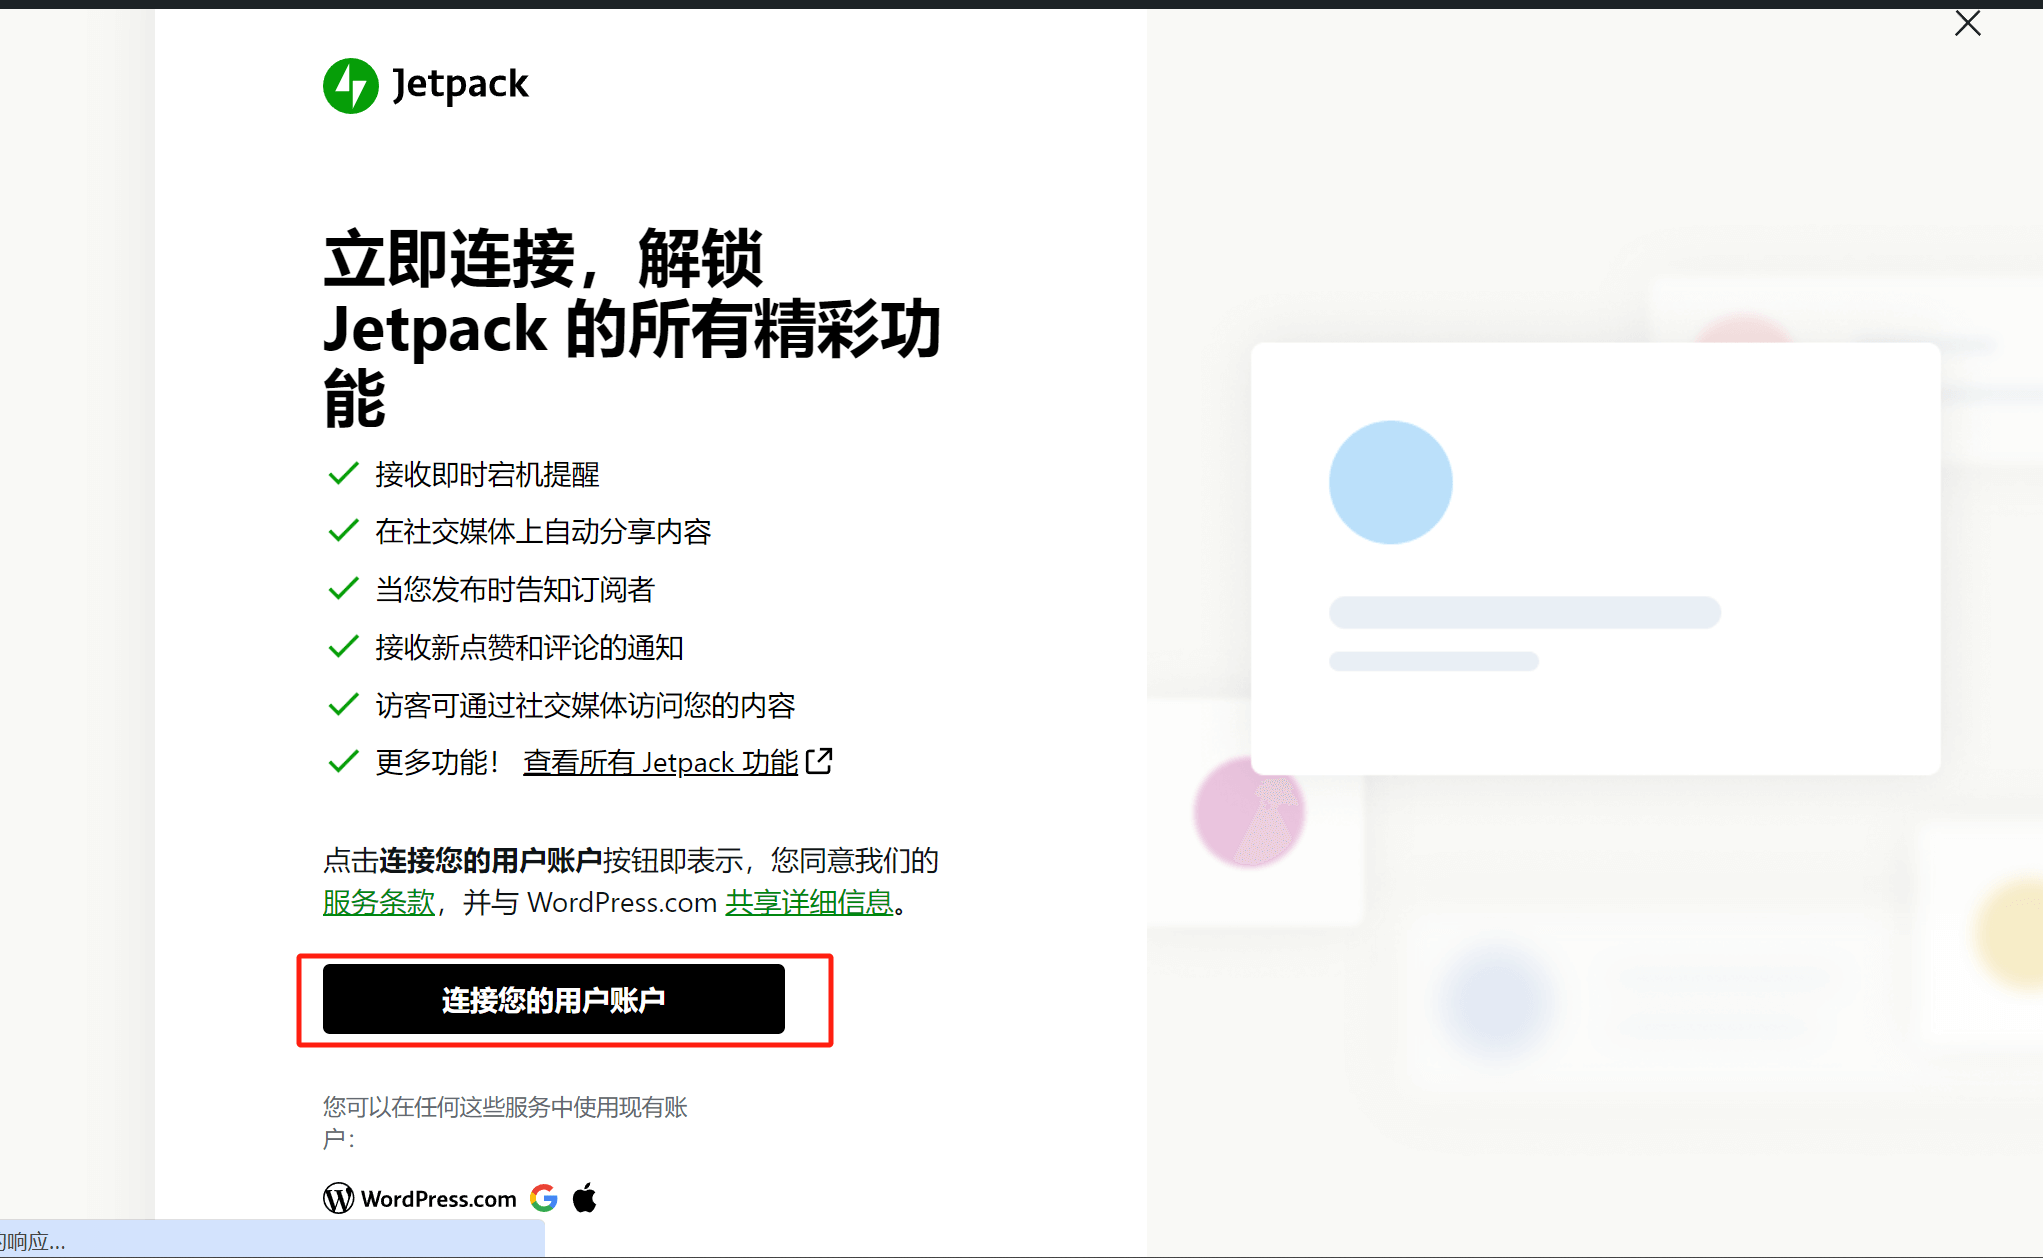
It’s important to clarify this point so that the following steps won’t be confusing. There are two versions of WordPress: one is WordPress.com and the other is WordPress.org. These are two different products, but both are under Automattic, the parent company of WordPress. Automattic originally developed and operated WordPress.com, which is positioned as a Blog Service Provider (BSP), mainly offering blog hosting services along with blog page styles and functional templates. Later, the open-source CMS platform—WordPress.org—was developed, which is the website-building system we’re more familiar with today. When we talk about connecting Jetpack with a WordPress account, we are referring to connecting with a WordPress.com account. The steps for the following process are illustrated in the image below:
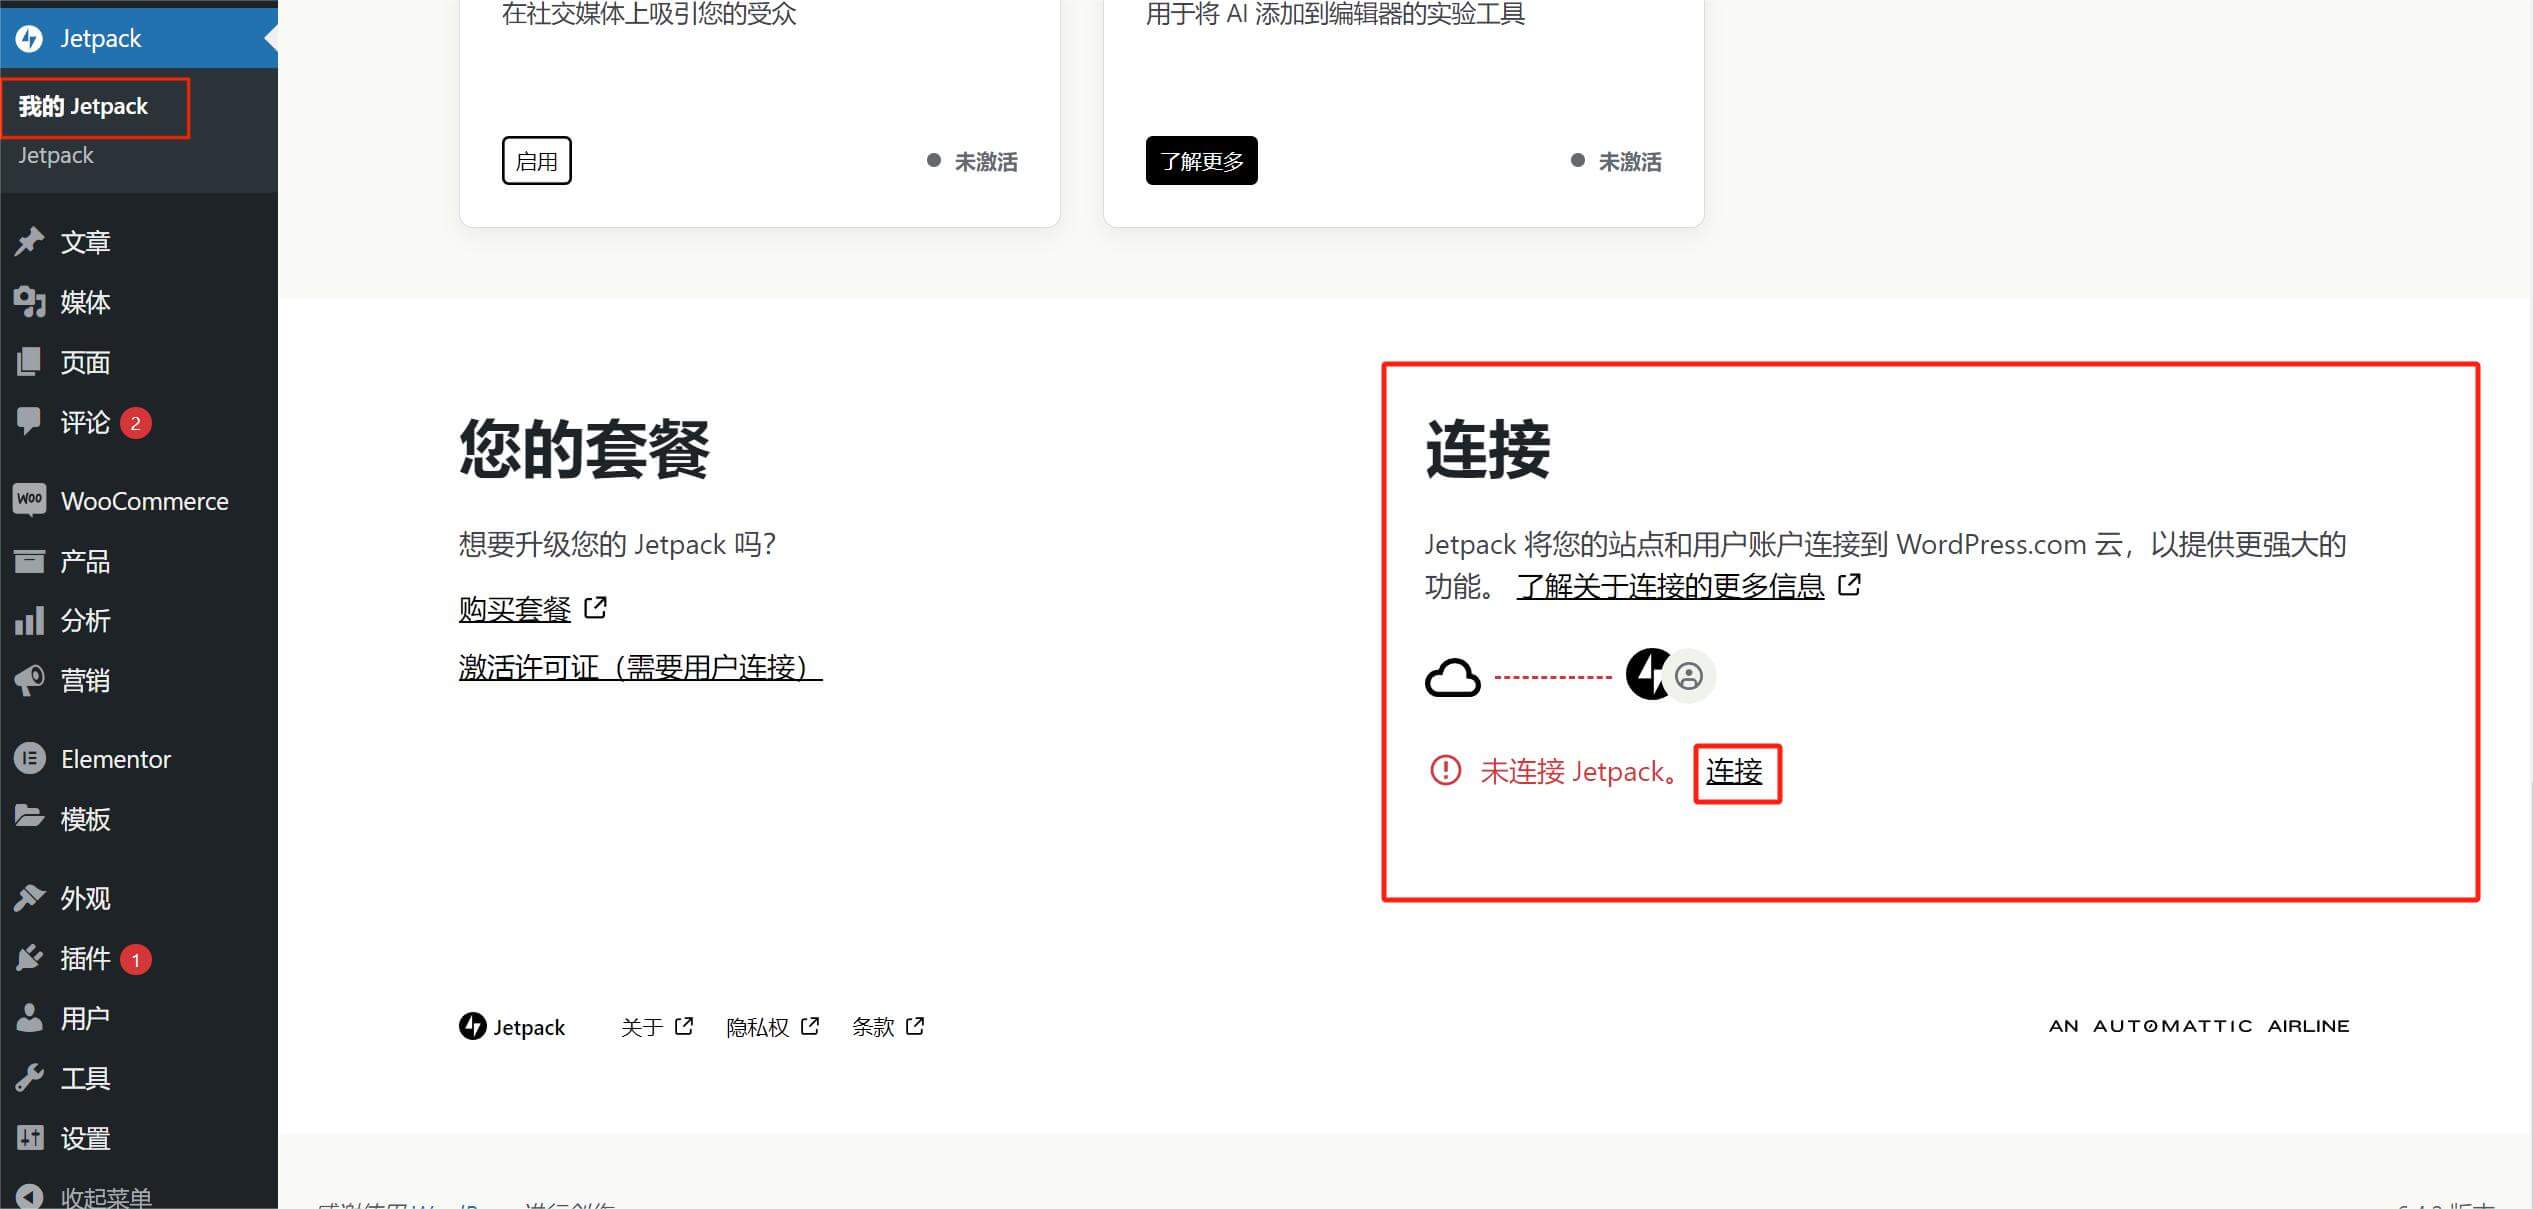
After installing Jetpack on WordPress, follow the path marked by the red box in the image. Click on the "My Jetpack" option under the Jetpack icon in the sidebar to enter the Jetpack plugin's homepage. Scroll to the bottom of the page, as shown in the image. You will see the current Jetpack plan information and connection status. After clicking the "Connect" button marked by the red box on the right, the page will redirect to the connection page shown below. Continue by clicking the "Connect Your User Account" button to enter the page where you can fill in your WordPress account details. If you don't have an account, follow the prompts to create one first.
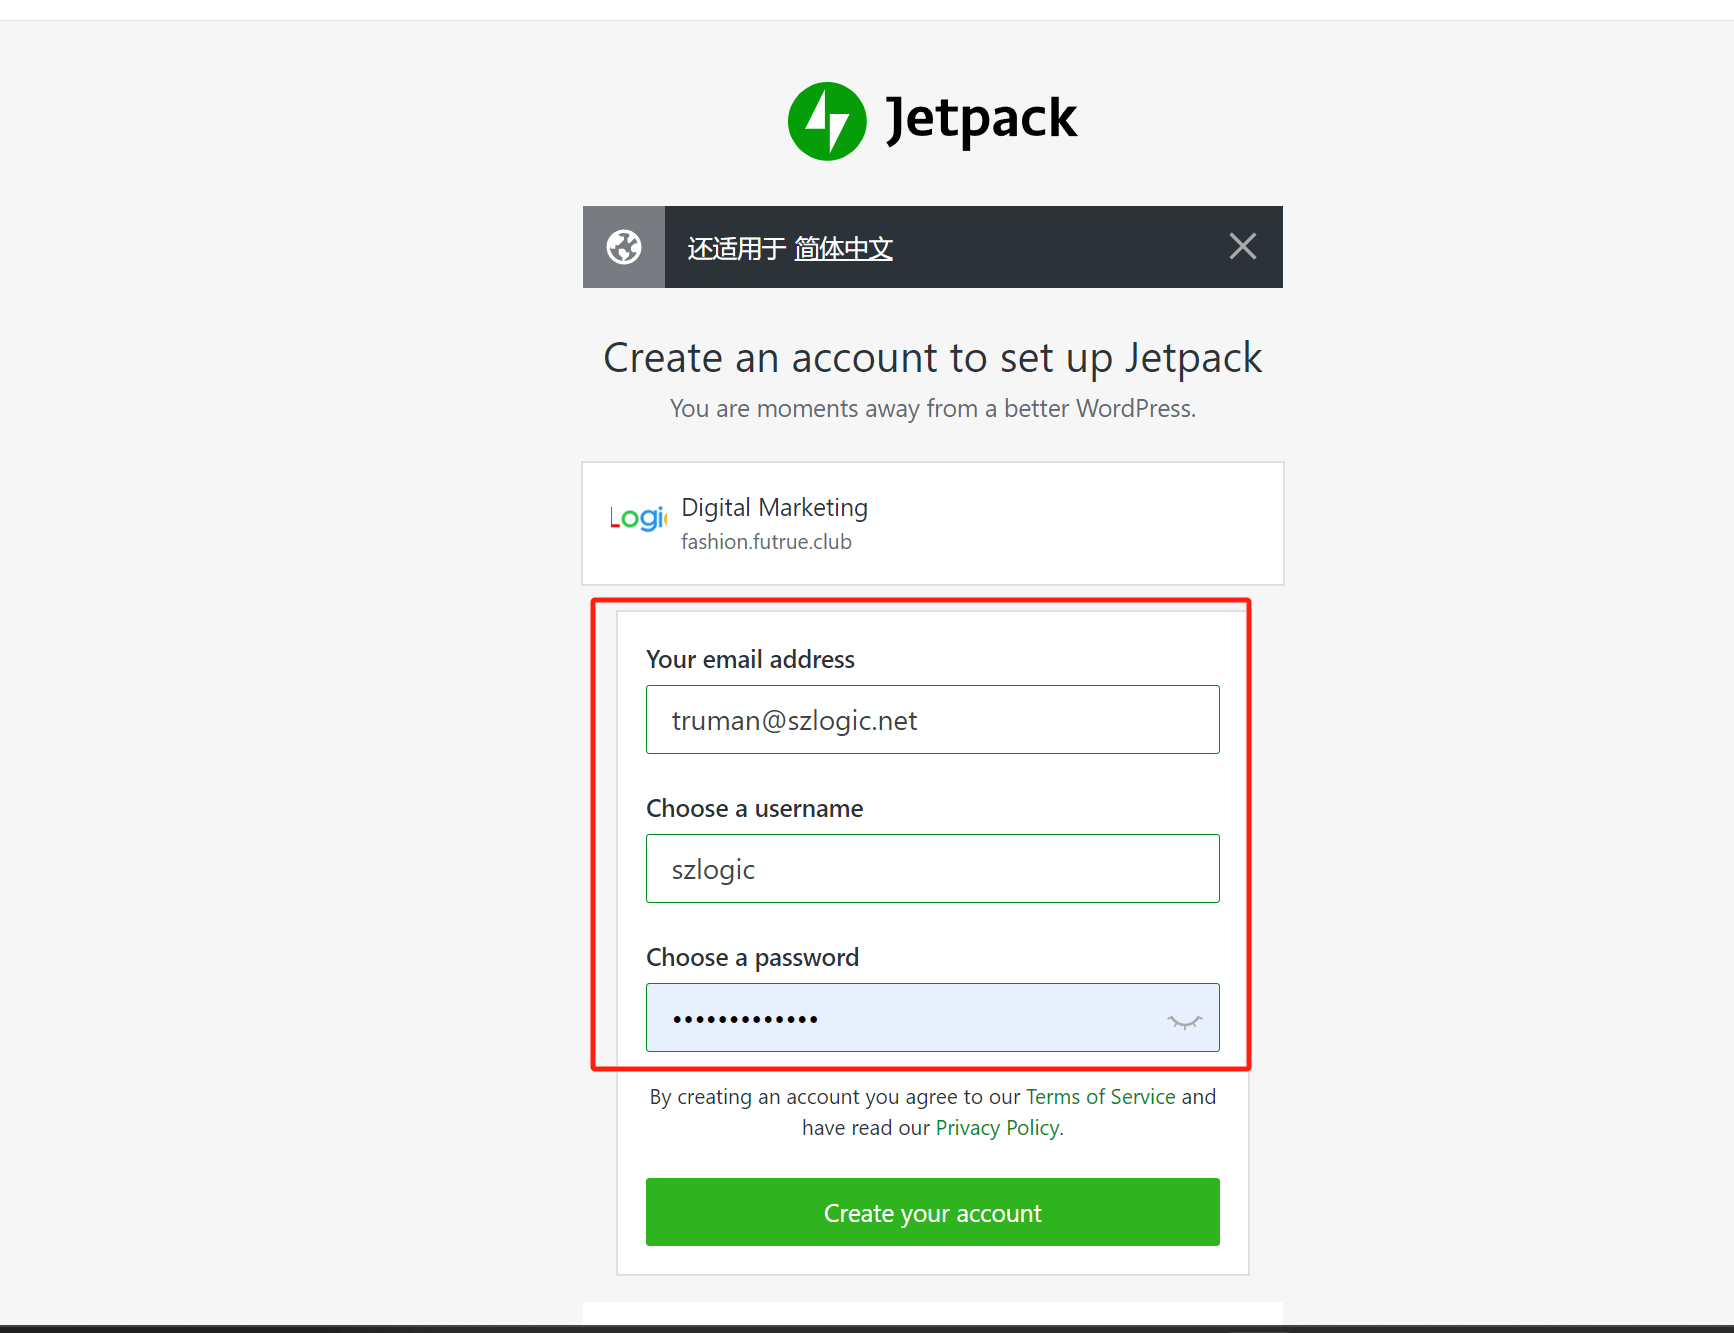
Follow Jetpack's instructions to create an account, then click the "Create your account" button to complete the WordPress account creation. At this point, the Jetpack connection is complete.
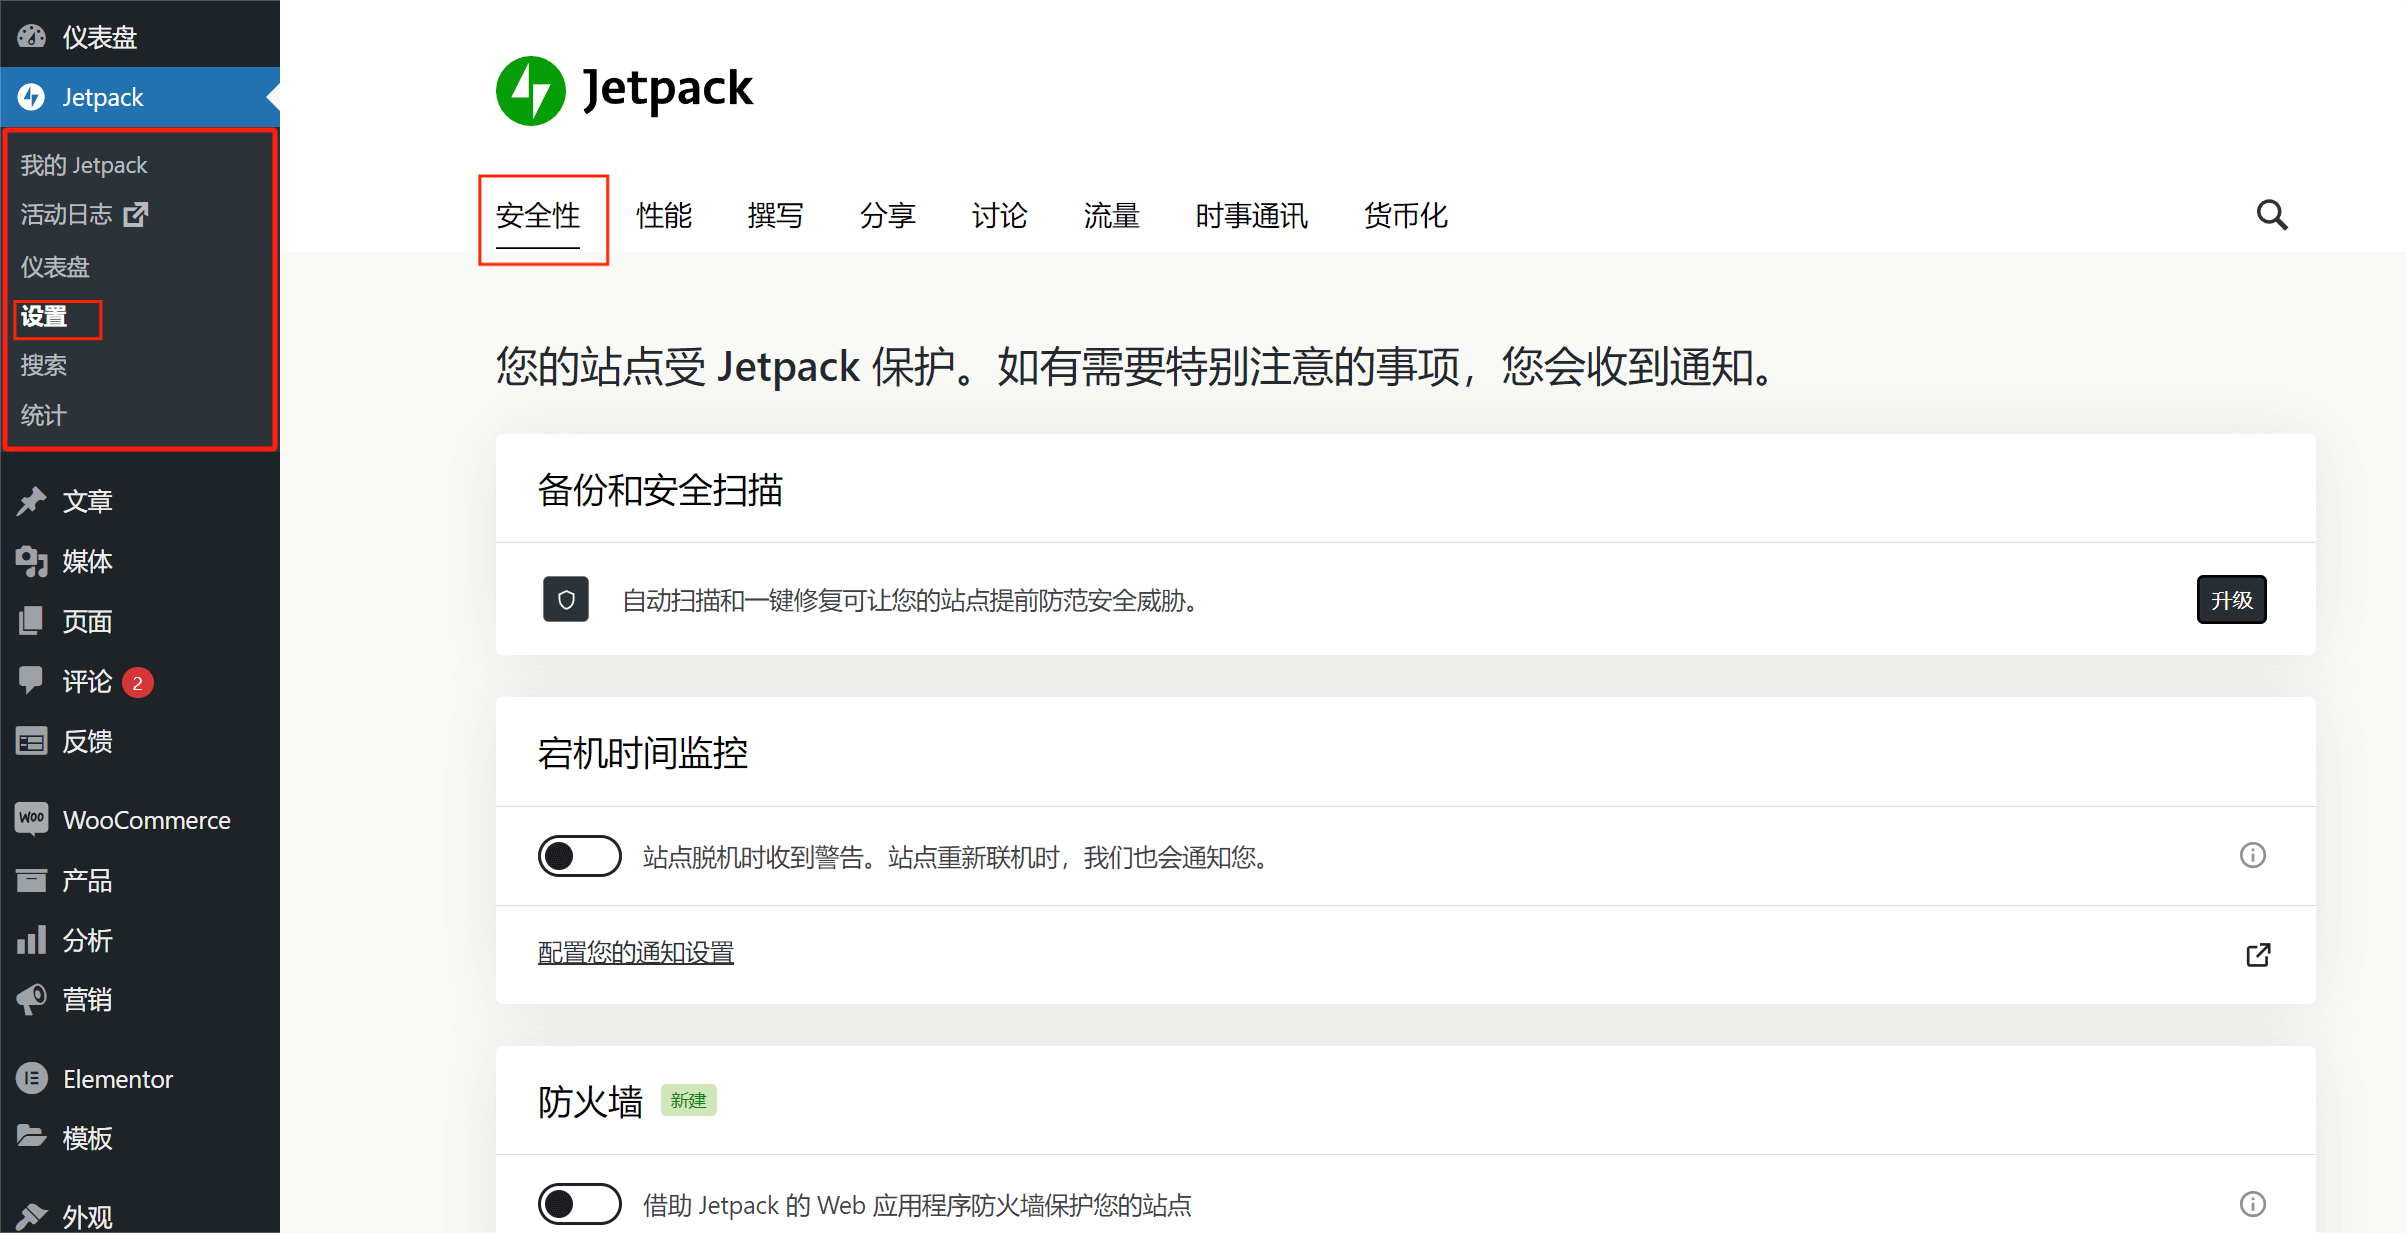
二、Security Settings
After successfully connecting Jetpack to your WordPress account, as shown in the red box in the image, a full set of feature options will appear under the Jetpack menu in the WordPress dashboard sidebar. Click on “Settings” in the feature menu to enter the Jetpack settings page. The settings page includes eight main sections: Security, Performance, Writing, Sharing, Discussion, Traffic, Newsletter, and Monetization. We'll start with the first section on the left — Security — to begin the configuration.
Backup and security scans
This is a feature of the Jetpack Pro version. This feature can back up WordPress websites and scan and check for security vulnerabilities on WordPress websites, helping webmasters identify vulnerabilities that may cause website intrusions, and repair vulnerabilities in advance to ensure website security.
Downtime monitoring
Downtime monitoring refers to monitoring whether the website's server is running normally. If the server is shut down normally or abnormally, Jetpack will detect it and send you feedback and record the situation by sending emails. This is a very practical function and it is recommended to turn it on.
Firewall
An important function to defend against hacker attacks and help protect websites from attacks and intrusions. This function needs to be turned on.
Strong protection
The strong protection function may effectively prevent the website's login account and password from being cracked by brute force. This function needs to be turned on.
WordPress.com Login Information
The setting of WordPress.com login information means that you can use the WordPress.com account bound to the Jetpack connection to log in to the backend of the WordPress website. This function is turned off by default, and it is recommended to keep it turned off by default, because if you can log in normally using the website's login password, there is no need to enable other login modes. The simpler the login mode, the safer it is for the website.
三、Performance Settings
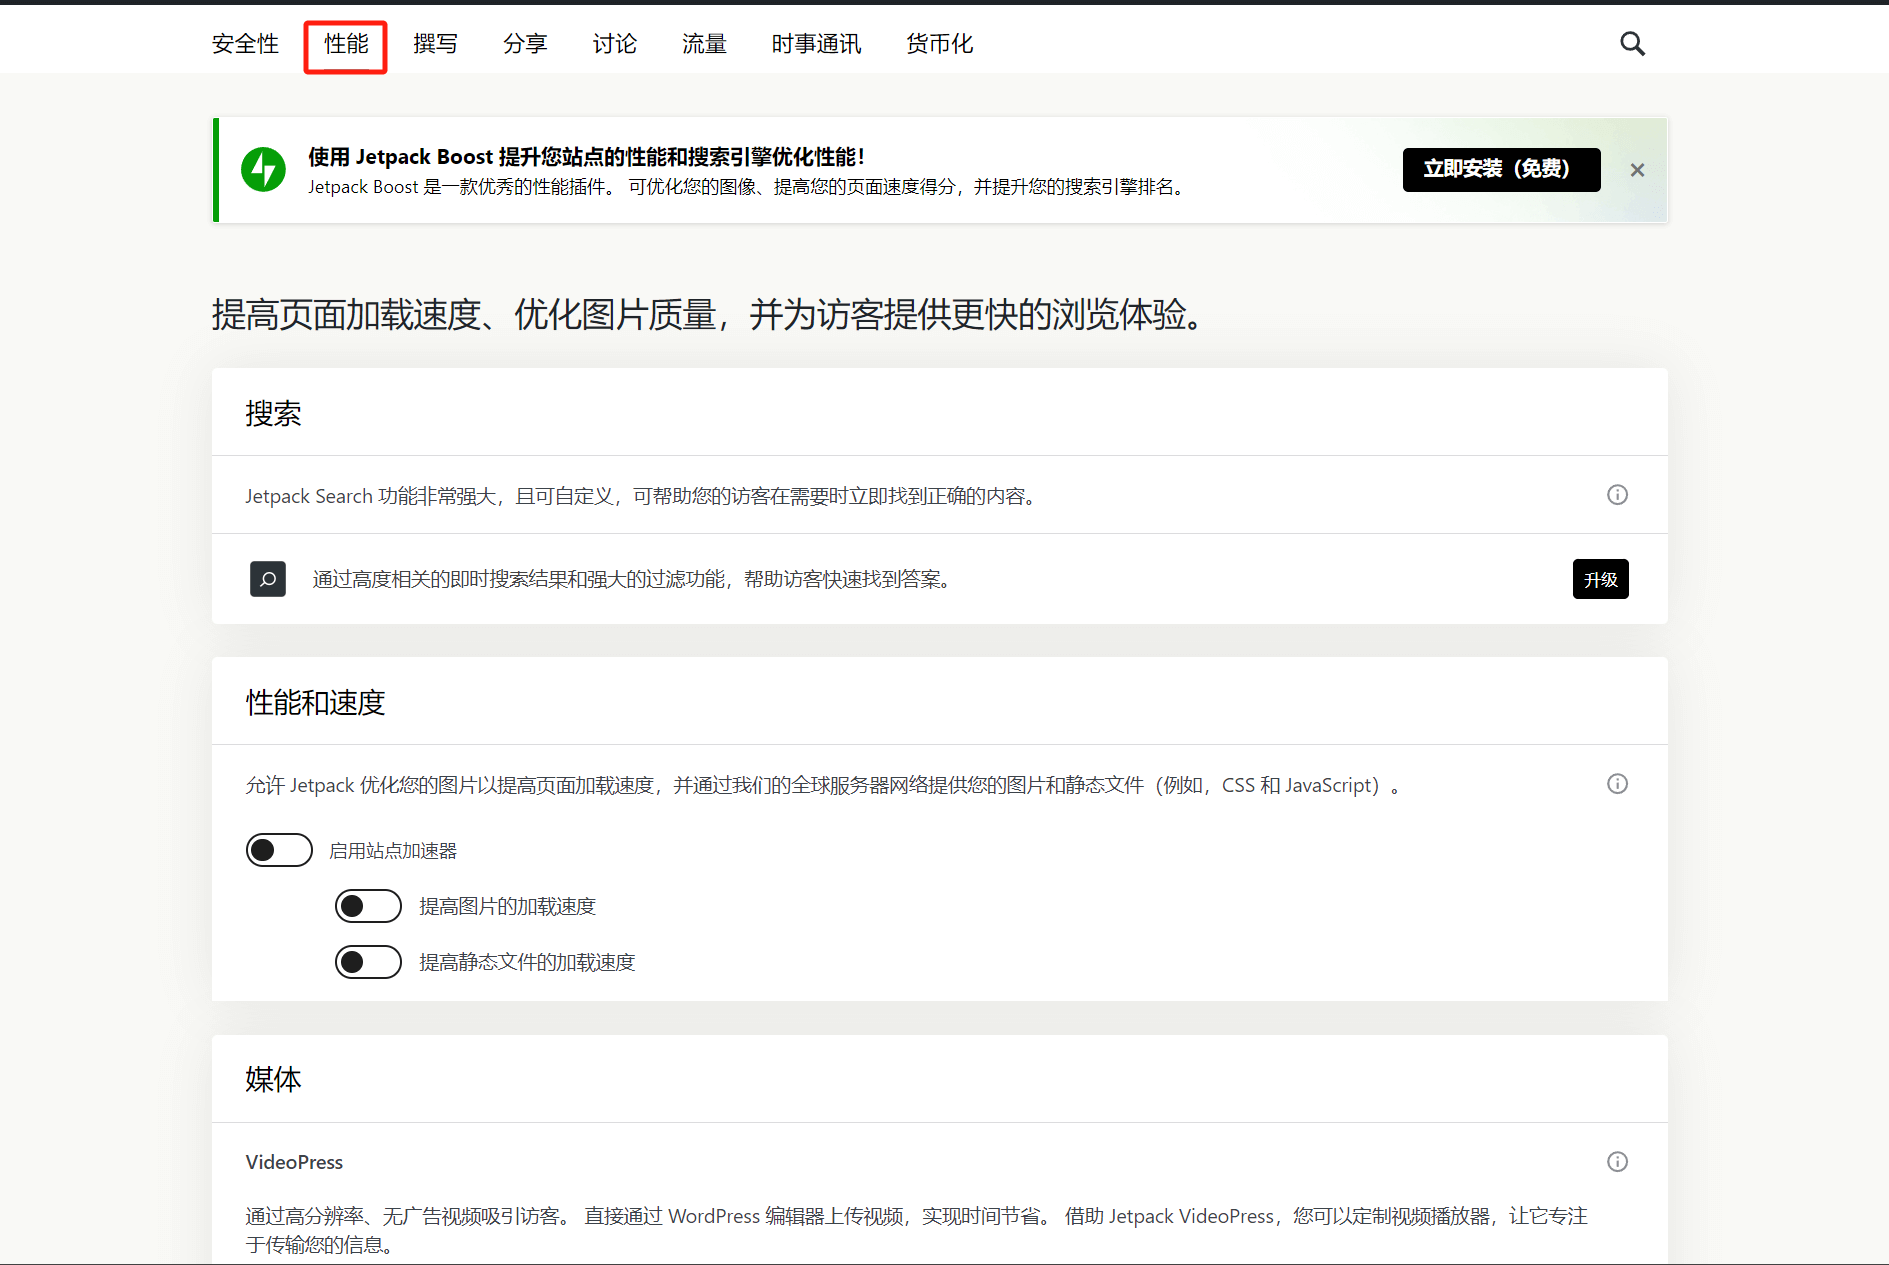
Search
Search is a feature of the Jetpack Pro version. More precisely, it can realize advanced search. Users can find the corresponding query content more conveniently when using the search function.
Performance and speed
Enabling the performance and acceleration features can effectively improve the loading speed of images and static files on your website. Jetpack will store your website’s images and static files, such as CSS and JS files, on its CDN servers, which improves the speed at which visitors from different regions around the world can load the images and static files on your pages. The performance and acceleration feature of Jetpack is an excellent tool for performance optimization and should be enabled.
Tip: There are many factors that can affect website loading speed. If other components that impact website performance have flaws, the performance optimization effects of Jetpack may not be very noticeable. To comprehensively improve website performance, it is necessary to also optimize the server, code, file compression, etc.
VideoPress
Jetpack's video hosting feature allows you to upload video files via the WordPress Classic Editor and choose to host them on Jetpack's servers instead of storing them on your website's server. This can help reduce the load on your website’s server. Whether to enable this feature depends on the nature of your website's content. If video files are not a primary component of your content or there are very few videos, there is no need to enable this feature. However, if videos are a significant part of your content, it is recommended to enable this feature.
四、Writing Settings
The Writing Settings page in Jetpack offers a wide range of configurable features, including image carousel display, the ability to write content using Markdown, and settings for post loading styles.
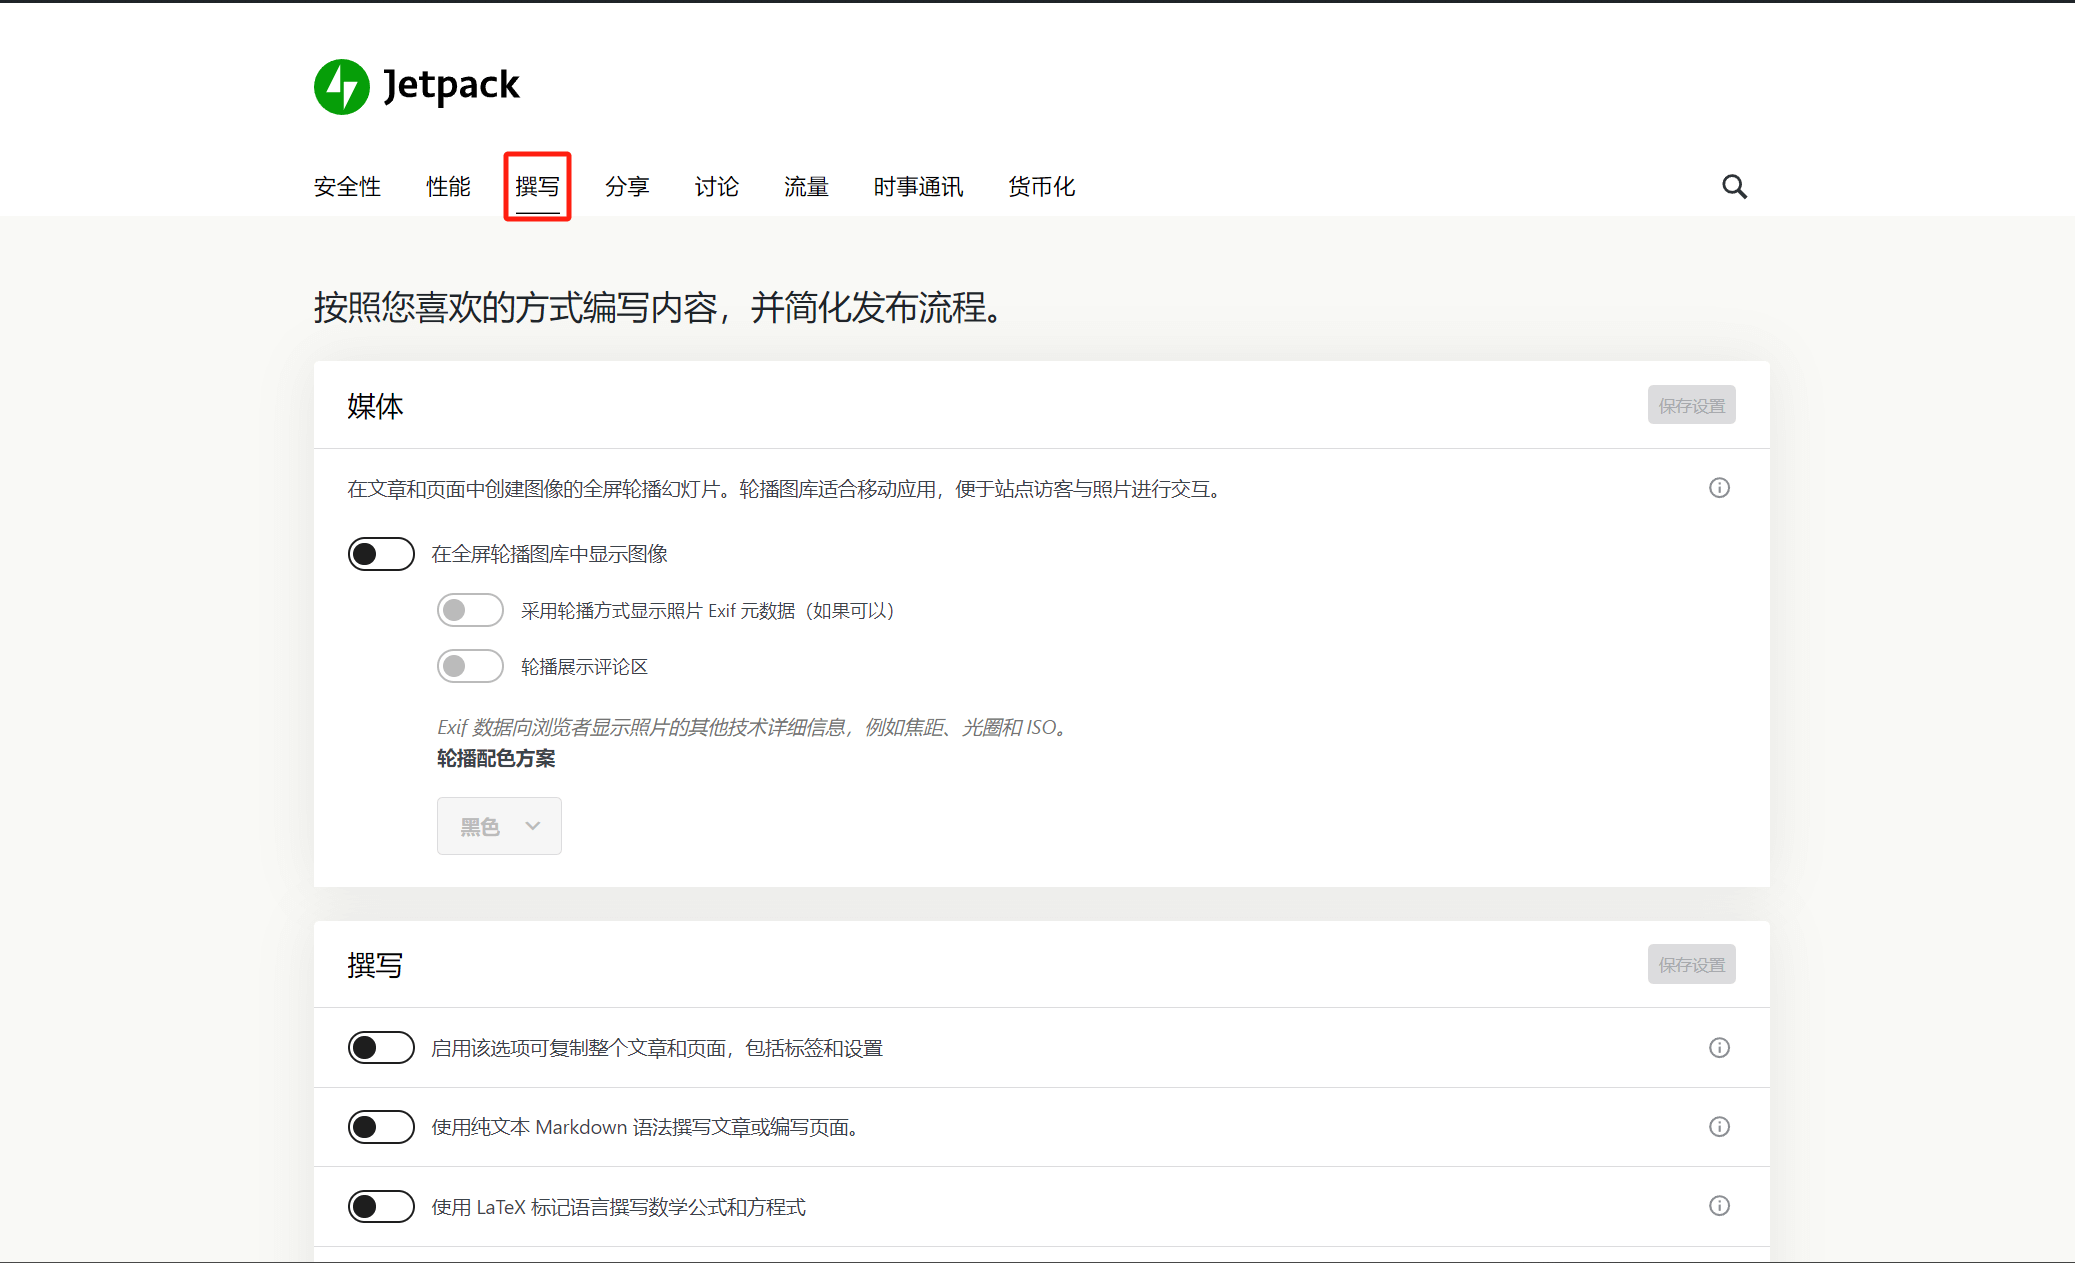
Display images in a fullscreen carousel gallery
By enabling the option to display images in a full-screen carousel gallery, users on the front-end of the website can click on image files to view them in a carousel format. This allows users to control the viewing order of the images on the page.
Writing
The features that can be controlled within the Writing section include enabling the copy feature for article pages, using Markdown and LaTeX markup languages to write content, and the default Jetpack editor block. If there is no need to use markup languages, it is recommended to keep the settings in the Writing section at their default values.
Custom content types
Adding Jetpack's comment section and portfolio gallery to posts requires theme support. If the theme does not support Jetpack's comment and portfolio sections, you can use the shortcodes provided to display them. Whether to enable this feature depends on the website's needs and personal preferences.
Theme Enhancements
Infinite Scroll: Configure how content is loaded on the post archive page. Whether to enable it depends on personal preference—if not needed, simply leave it disabled by default.
Custom CSS: Same as the theme’s custom CSS feature; this option generally does not need to be enabled separately.
Gadgets
Once this feature is enabled, Jetpack will generate available widgets under the "Appearance" – "Widgets" section in the sidebar tools. These widgets can be added to custom sidebars by simply dragging and dropping them.
Publish by Email
A function that allows you to review articles via email and decide whether to publish them.
WordPress.com Toolbar
This feature should not be enabled because once the WordPress.com toolbar is activated, it will replace the default WordPress admin toolbar in the browser, which may cause inconvenience when managing the WordPress backend.
五、Sharing Settings
The Share section settings in Jetpack focus on configuring social media interaction features. By enabling these functions, you can connect your website with social media platforms, automatically sync and share site content to your social media accounts, and enhance the website’s presence and engagement on social networks by boosting its social signals.
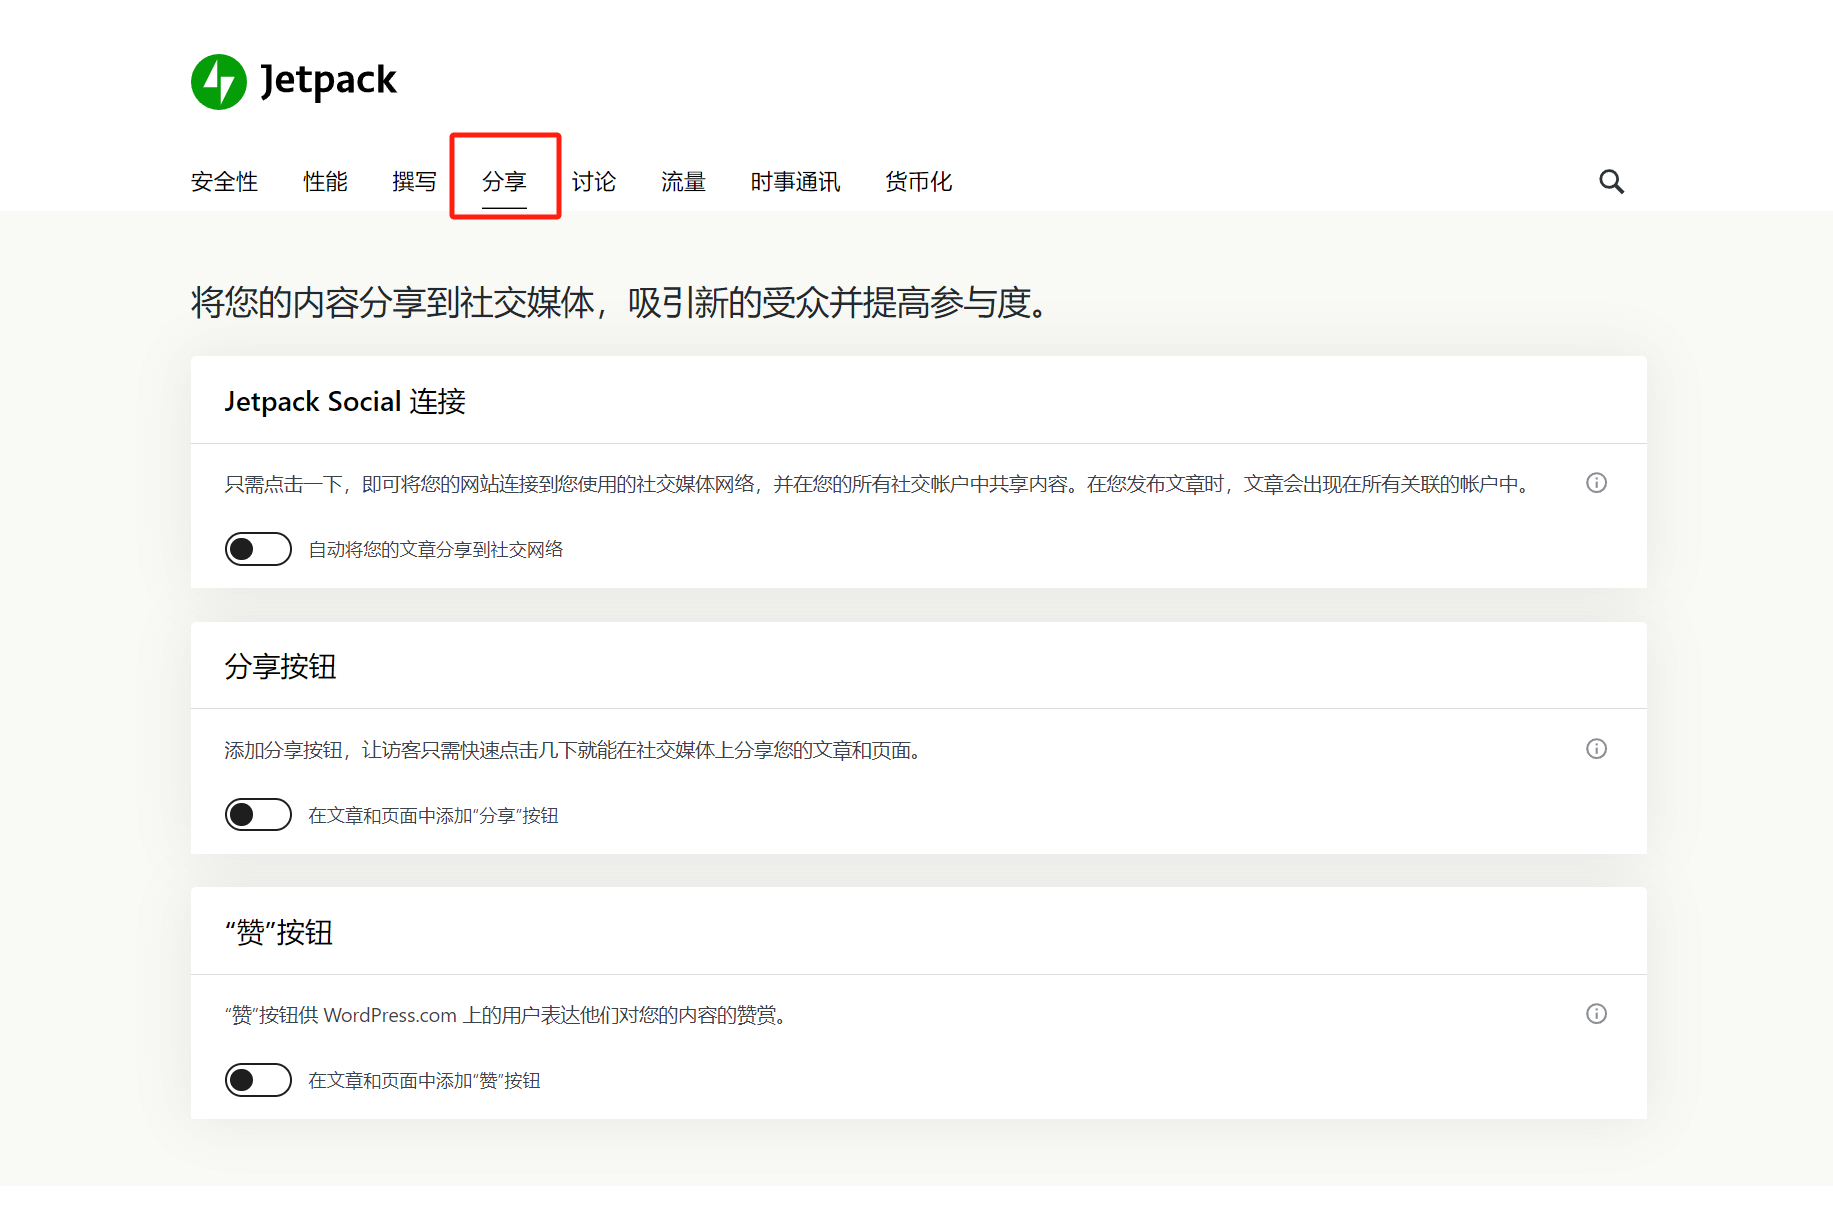
Jetpack Social
Connect your social media account to Jetpack to synchronize articles published on your website. Click the Enable button and follow the prompts to enter your social media account information.
Share Button
Add social media sharing buttons to the article so that readers can share the article content to their own social media with one click while reading the article.
Like button
Add a like button to your article so readers can like it after logging into their WordPress.com account.
六、Discussion Settings
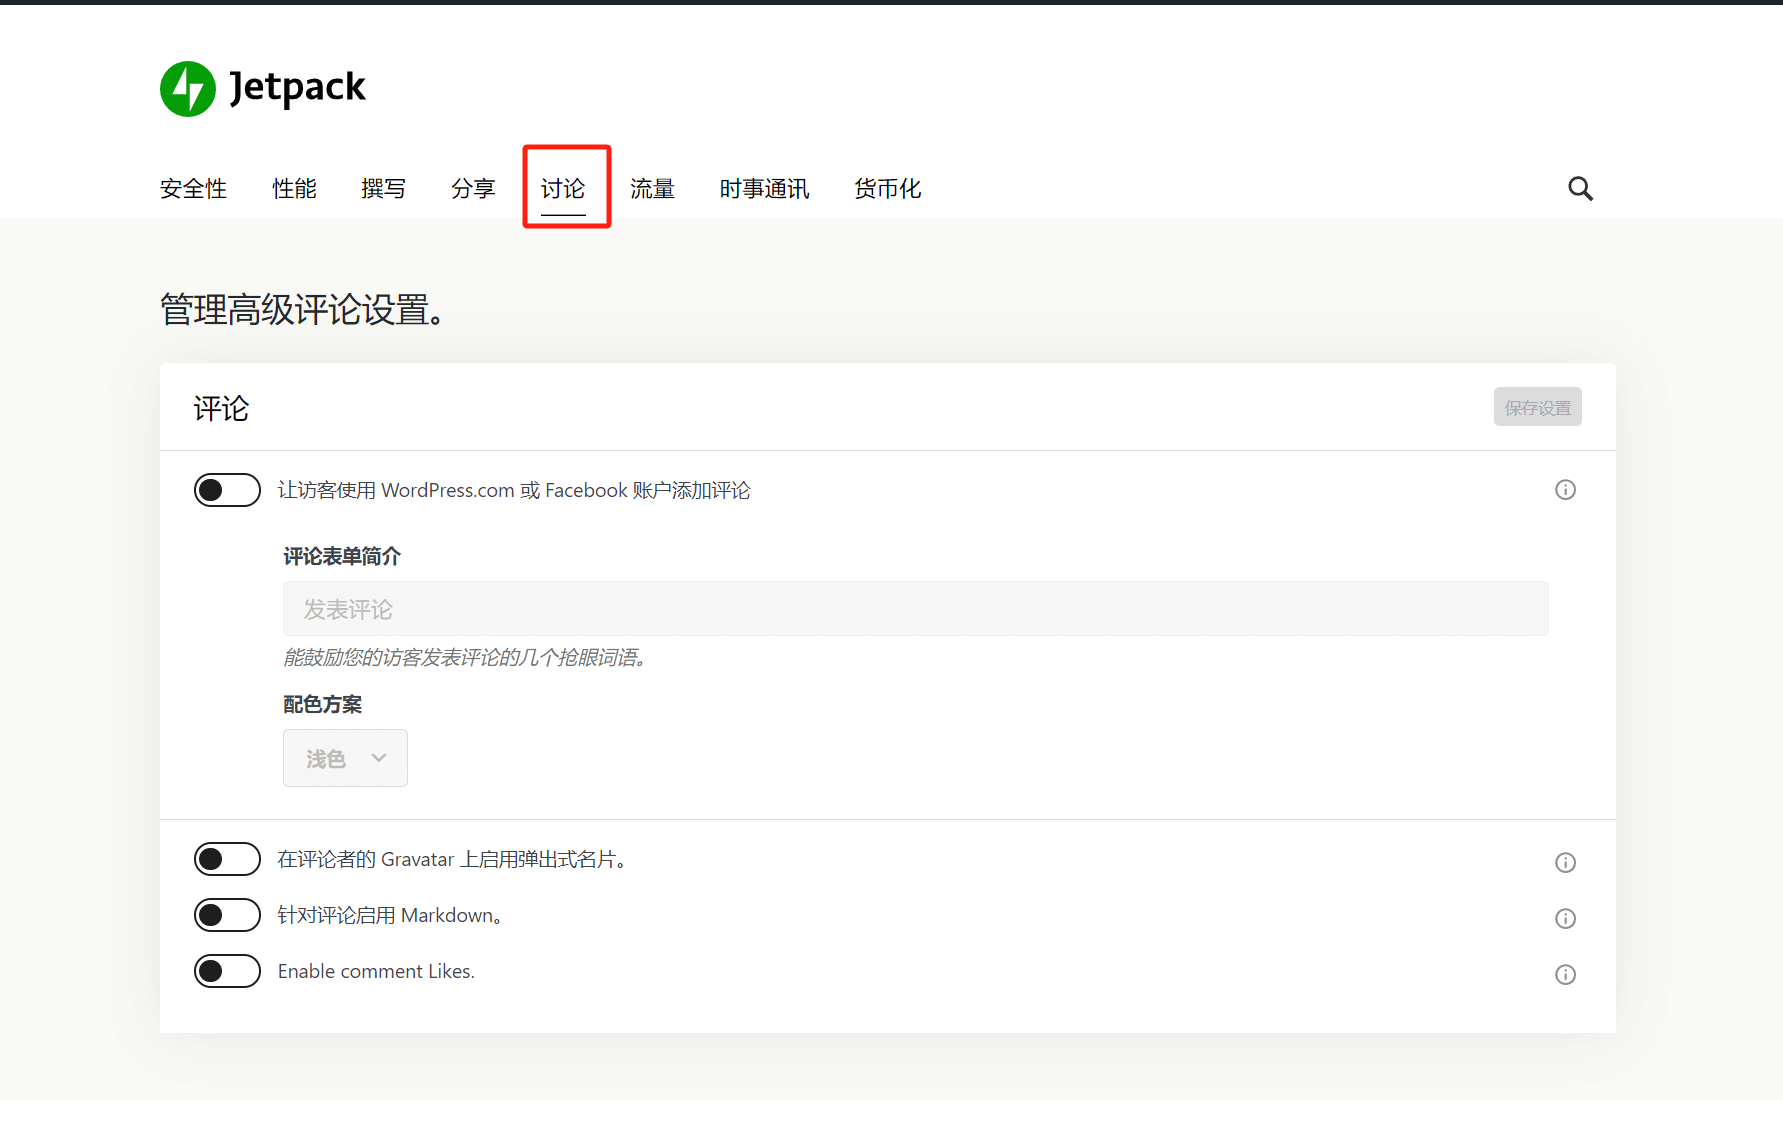
Allow visitors to comment using their WordPress.com or Facebook account: This setting determines whether users need to log in with their WordPress.com or Facebook account to leave comments on posts. It is recommended to keep this feature turned off by default to avoid creating obstacles for users when commenting.
Enable popup business card on commenter's Gravatar: The avatar hover card feature. When enabled, moving the mouse over a user's avatar in the comments section will display a popup with the user's information. Whether to enable this feature depends on personal preference.
Enable Markdown for comments: Whether to allow users to write content in comments using Markdown language. This is a relatively niche feature, and whether to enable it depends on personal preference.
Enable comment Likes: Whether to enable the comment like feature. It is generally recommended to turn this on.
七、Traffic Settings
The traffic settings page concentrates on a number of functional settings related to page traffic, including the display settings of related articles, general search engine optimization settings and statistics, access to Google Analytics, etc.
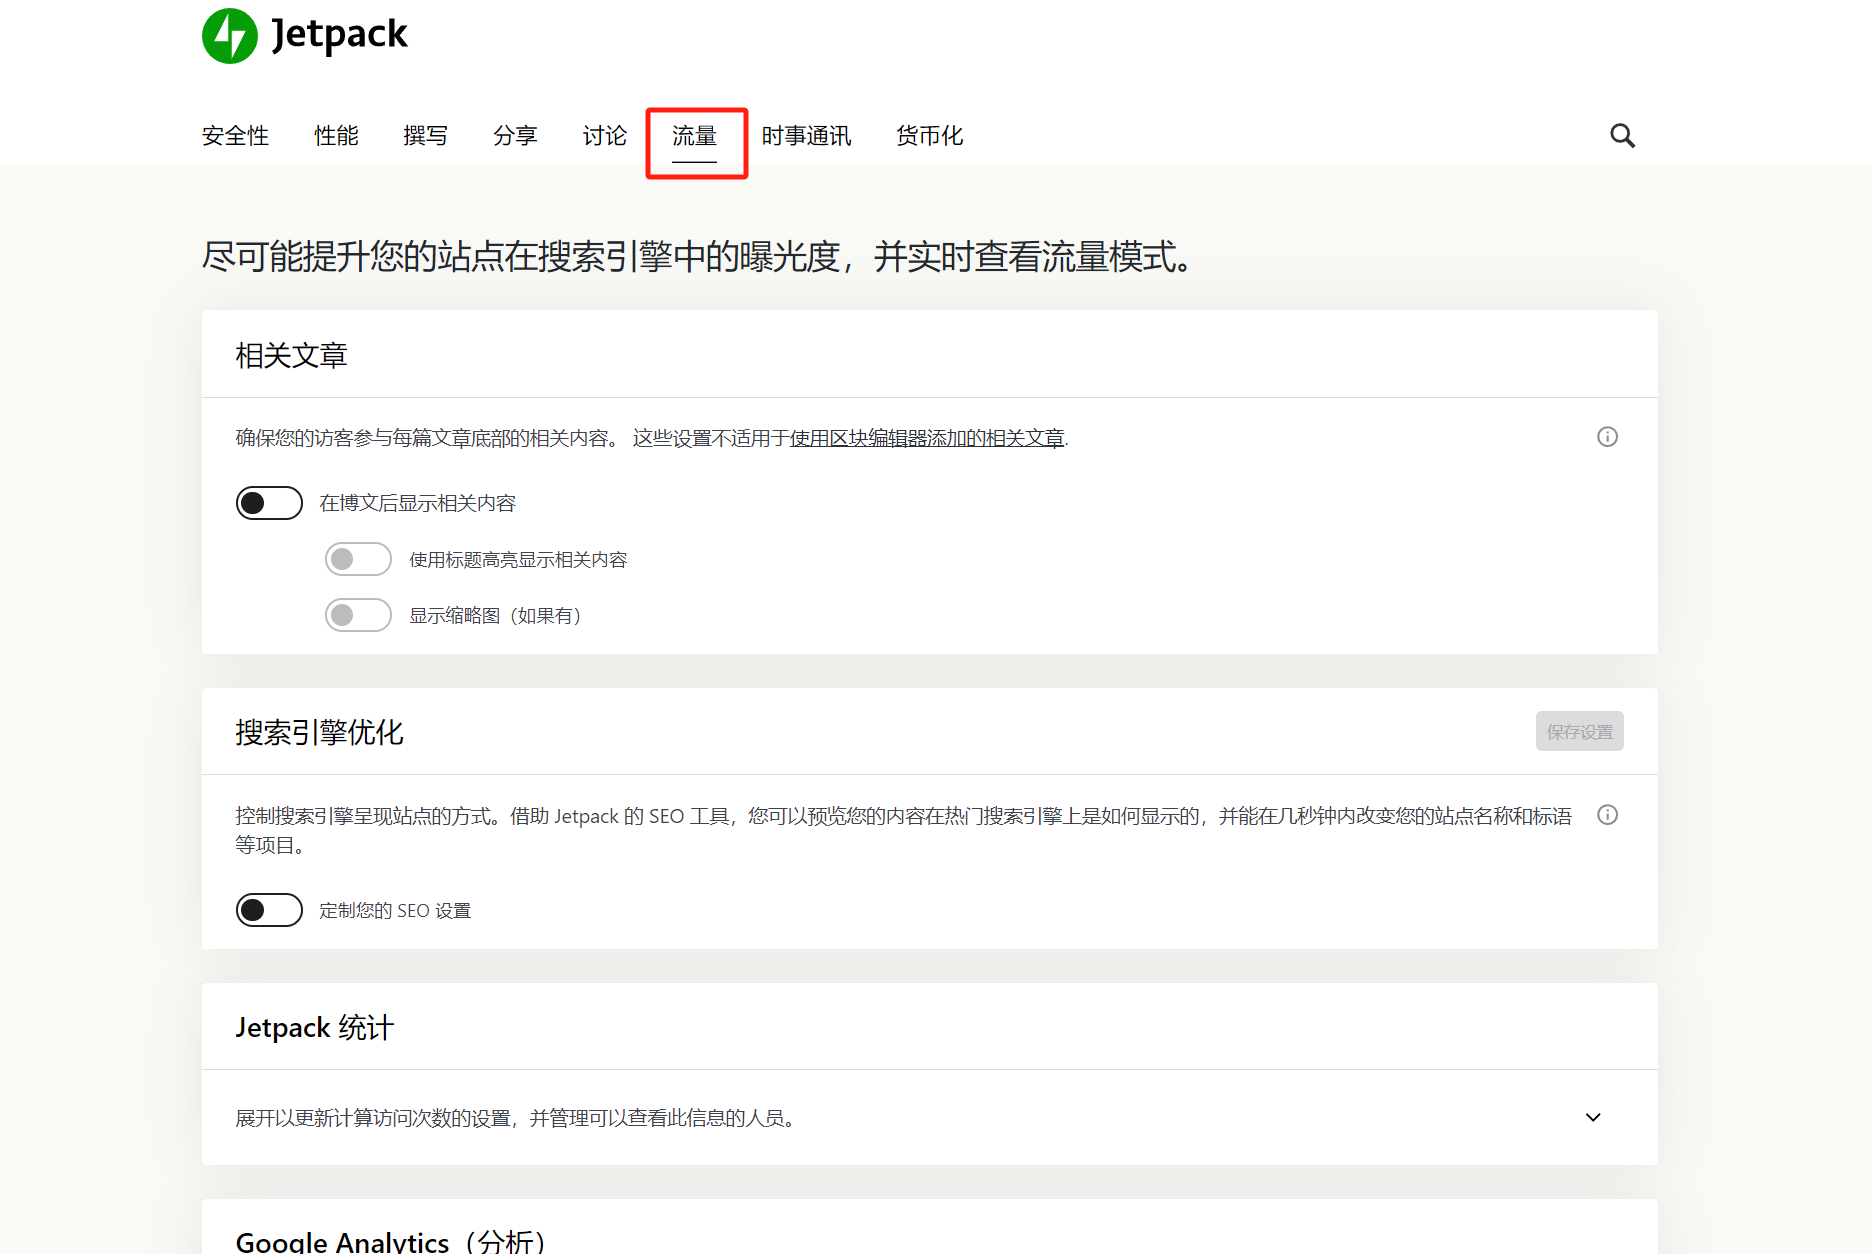
Related articles
Display Related Posts at the Bottom of Articles: This is an effective tool for increasing the overall article views on a website. LOGIC’s article pages also use this feature, but LOGIC implements it through the theme rather than Jetpack’s related posts feature. When enabling this function, it is recommended to first check whether your WordPress theme includes a related posts feature. If it does, you should only enable this function in either the theme or Jetpack—not both—to avoid code conflicts.
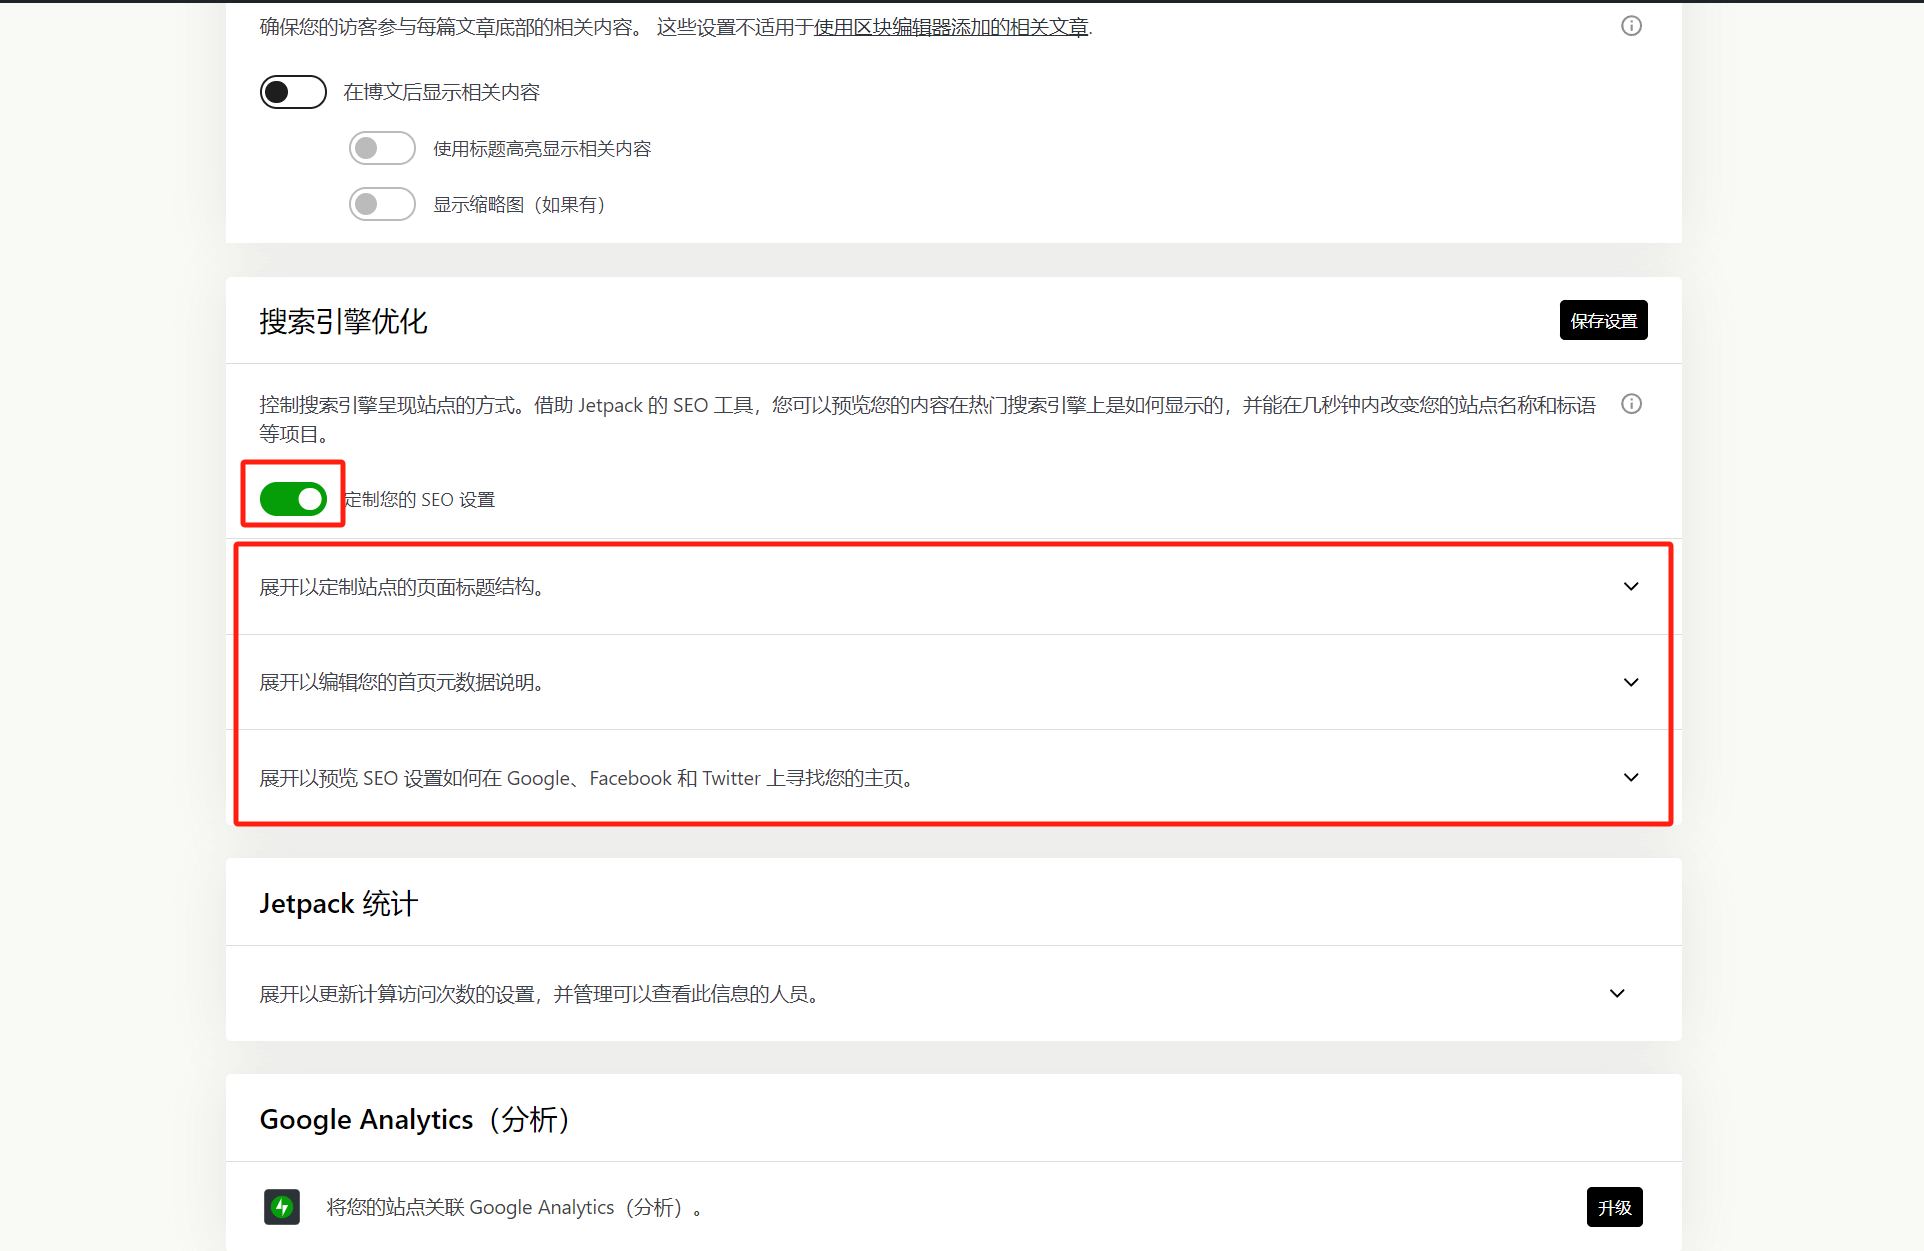
Organic Traffic Acquisition
The search engine optimization features of Jetpack, when enabled, will display the configurable options as shown in the red box in the image below. Click each feature to expand and set up the corresponding search engine optimization functionality.
Jetpack Statistics
This is the settings for Jetpack's data analytics feature. After clicking the expand icon, you can see each configurable sub-option. Enable or leave the default values based on the specific needs of the website.
Google Analytice
Google Analytics is a Jetpack Pro feature and requires an upgrade to a paid plan to use. This feature allows you to link Jetpack with Google Analytics and install Analytics on your WordPress website, enabling you to view Google Analytics data directly from the Jetpack dashboard. However, my usual website setup habit does not involve using Jetpack’s Google Analytics integration. Instead, I prefer to use the Site Kit plugin developed by Google for installation. Interested readers can refer to another article I wrote: How to Install Google Analytics on Shopify and WordPress Websites for a detailed tutorial.
Vigorous publicity
WordPress.com's advertising service function, use WordPress.com's promotion function to promote articles on the website.
WP.me Short Link
It is not recommended to enable this function. If this function is enabled, a short link will be automatically generated for each article page. Multiple URLs for the same page will cause duplicate content for SEO, affecting the effectiveness of SEO.
Sitemap
Generate site xml function. If you do not plan to generate site xml map using other methods, you can enable this function to generate site xml map
Site Verification
You can use Jetpack's feature to verify website ownership and submit your website to various search engines and social media platforms
Google: Directly click the "Automatically verify with Google" or "Manually verify with Google" button to connect Google's Google Search Console for site verification
Bing, Pinterest, Yandex, Facebook: The verification methods for these search engines and social media are basically the same. Use the manual website/code mode in the site management backend of each platform to generate meta tags, then copy and paste the meta tags into the corresponding input boxes under Jetpack's site verification and save the settings.
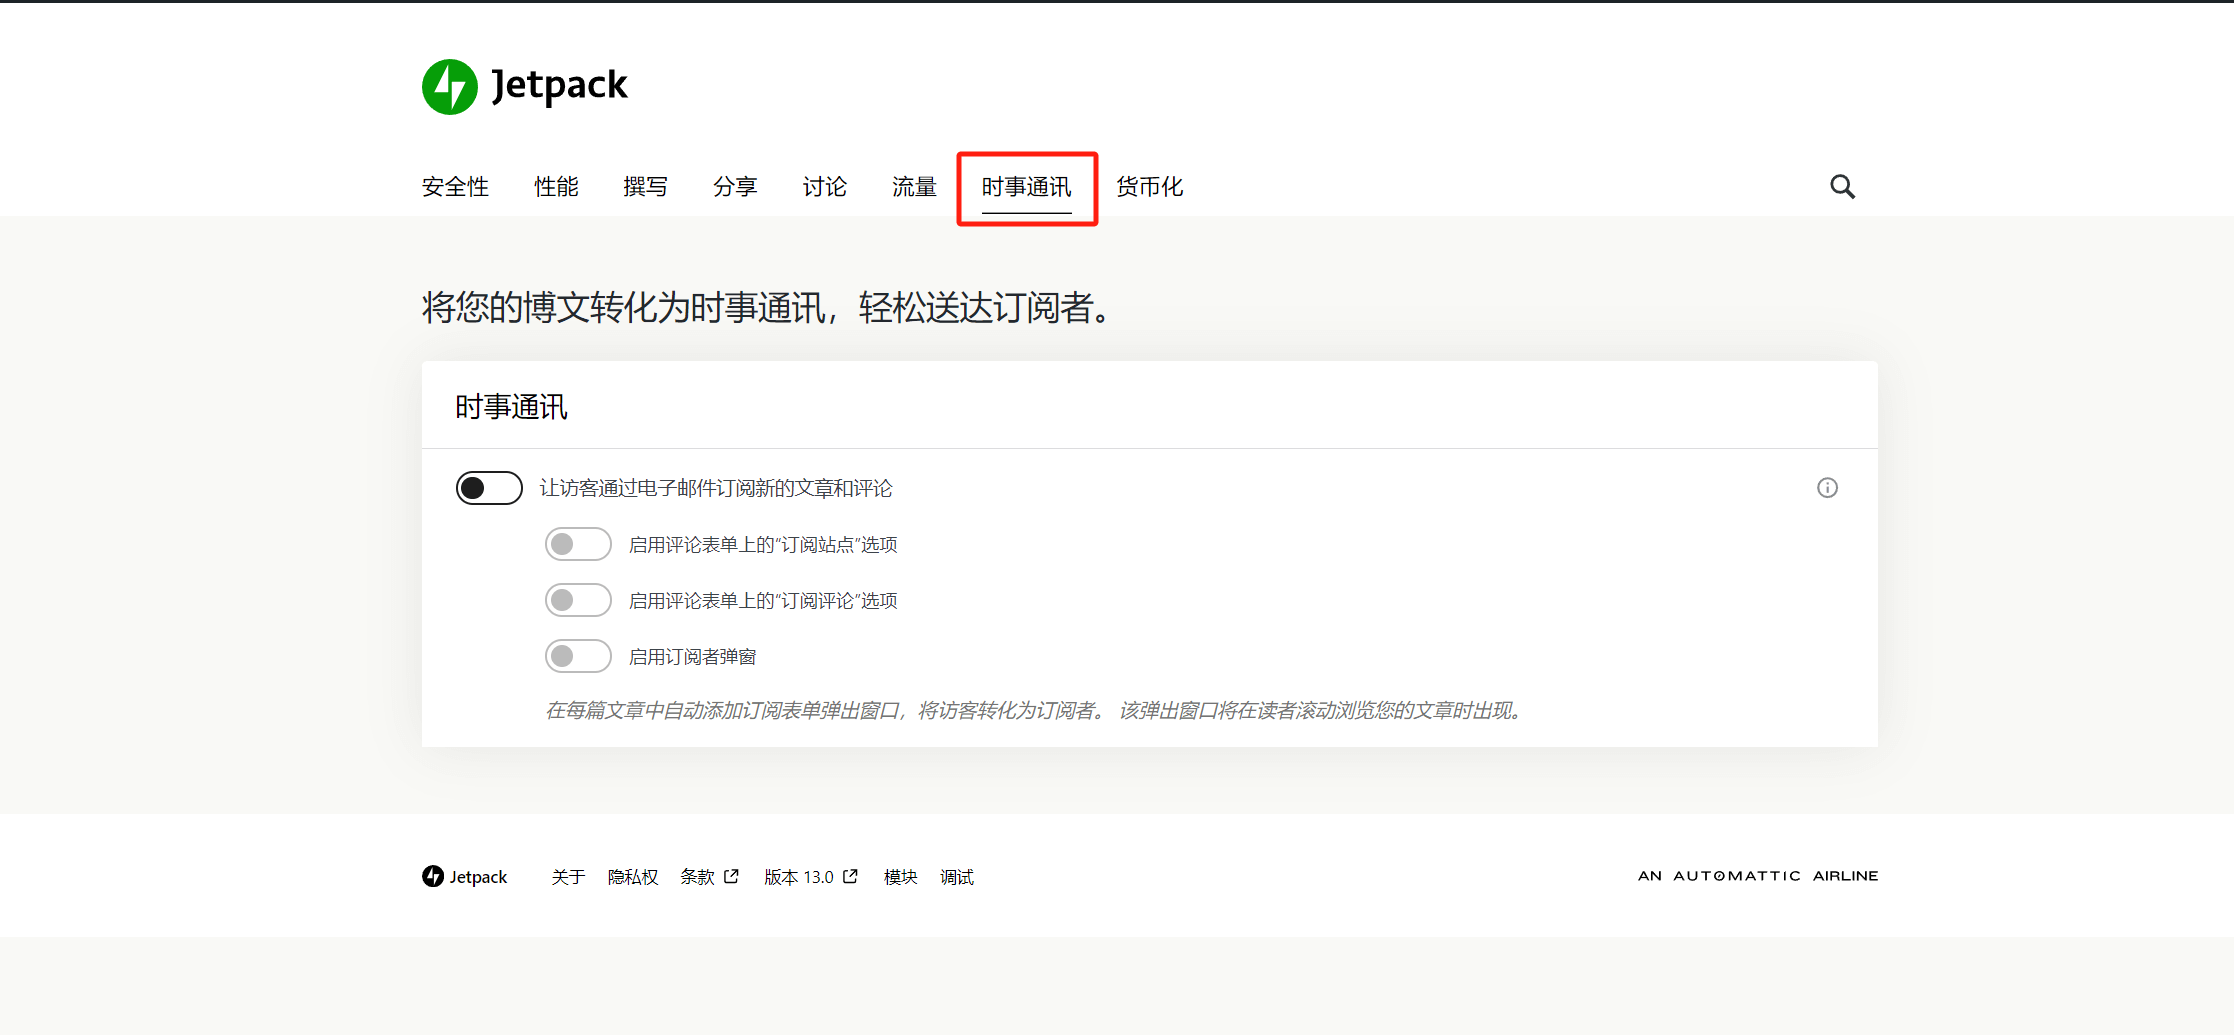
八、Newsletter Settings
The settings on the newsletter settings page are relatively simple, which is to enable the subscription function for article pages and comments. Readers can choose whether to enable it according to their needs.
九、Monetization Settings
The monetization function settings are not suitable for e-commerce websites. The functions in monetization are matched with content sites and are related function settings to help content websites realize monetization and obtain income.
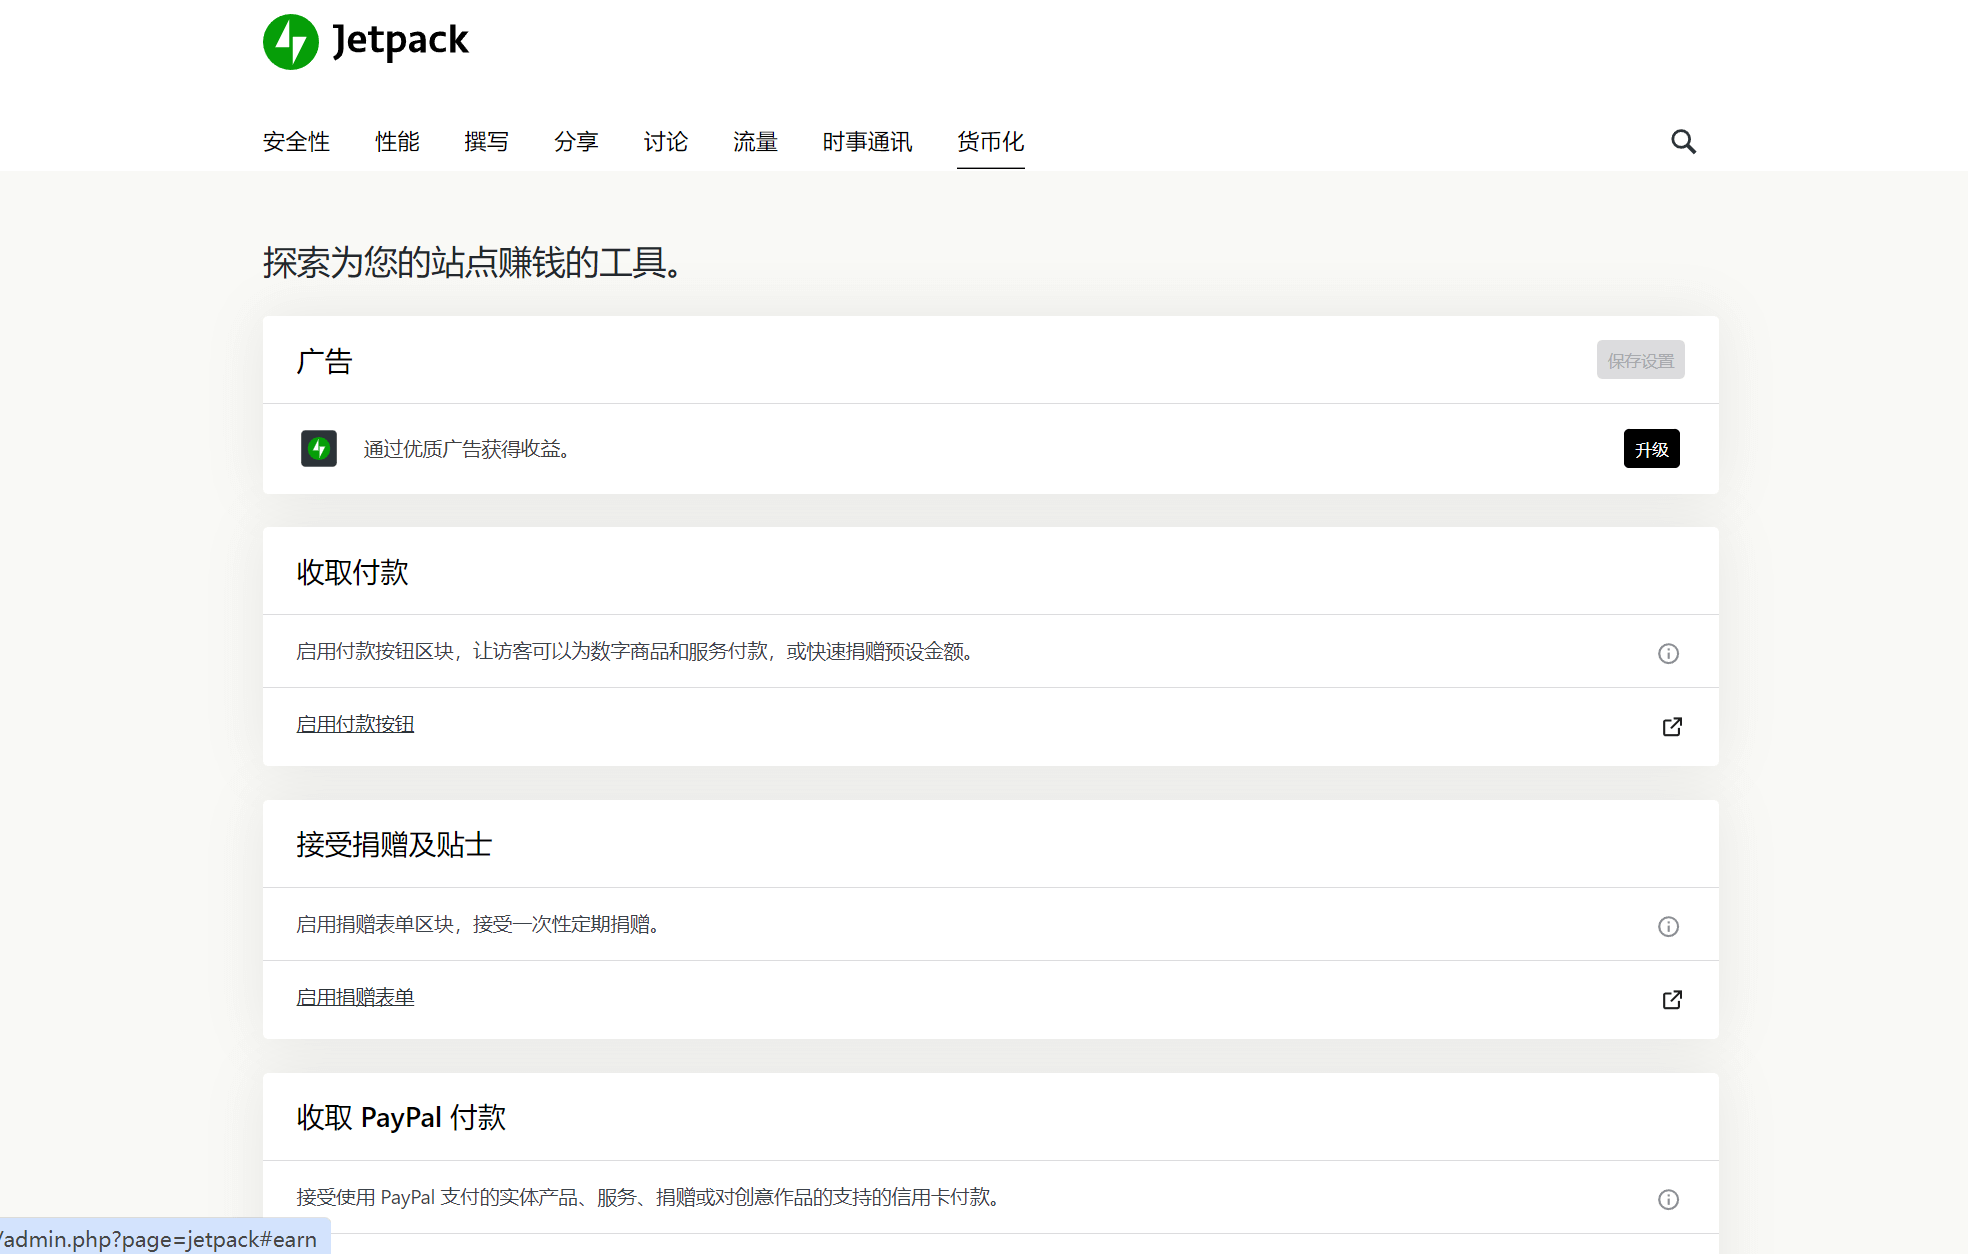
Advertise
This feature is available in the Jetpack Pro version and requires an upgrade to use. Once enabled, it allows the website to accept WordPress.com ads, enabling revenue sharing as part of an advertising network.
Receive Payment
Set up buttons for paid content or accepting user donations, allowing your website content to generate revenue. Once enabled, the Jetpack feature module in the page editor will generate buttons to control paid content. You can click or drag to apply this feature to page elements.
Accept donations and tips
Once this feature is enabled, a donation form block button will appear in the Jetpack feature module of the page editor. You can click or drag this feature block to apply the donation form to the page elements.
Receive PayPal payments
This feature is Jetpack's PayPal payment module. Once enabled, you can use this feature module in the page editor by clicking or dragging it to add a PayPal payment button to the page. Users can click the button on the frontend page to make payments using PayPal.
Note: The features in the monetization settings above all involve user payments and website collections. To ensure proper user payments and website collections, it is essential to set up the corresponding payment platforms or gateway channels in WordPress.com.
Conclusion: The above is a complete tutorial on how to use and configure Jetpack. Readers can selectively enable the features they need based on the specific nature of their website to extend the functionality of their WordPress site. By following the feature explanations provided in this tutorial, you can avoid knowledge gaps and improve the accuracy and efficiency of using Jetpack.
Logic Digital Technology (SZLOGIC) © All rights reserved. This article is welcome to be shared by individuals to help more users interested in using and learning the Jetpack plugin, but reproduction for commercial purposes is prohibited.


